Introduction
The Time Log module in VOLUM3 allows you to record how much time you’ve spent on project, stage or specific tasks. It helps keep track of your work, improves team visibility, and supports accurate reporting.
Accessing the Time Log Module
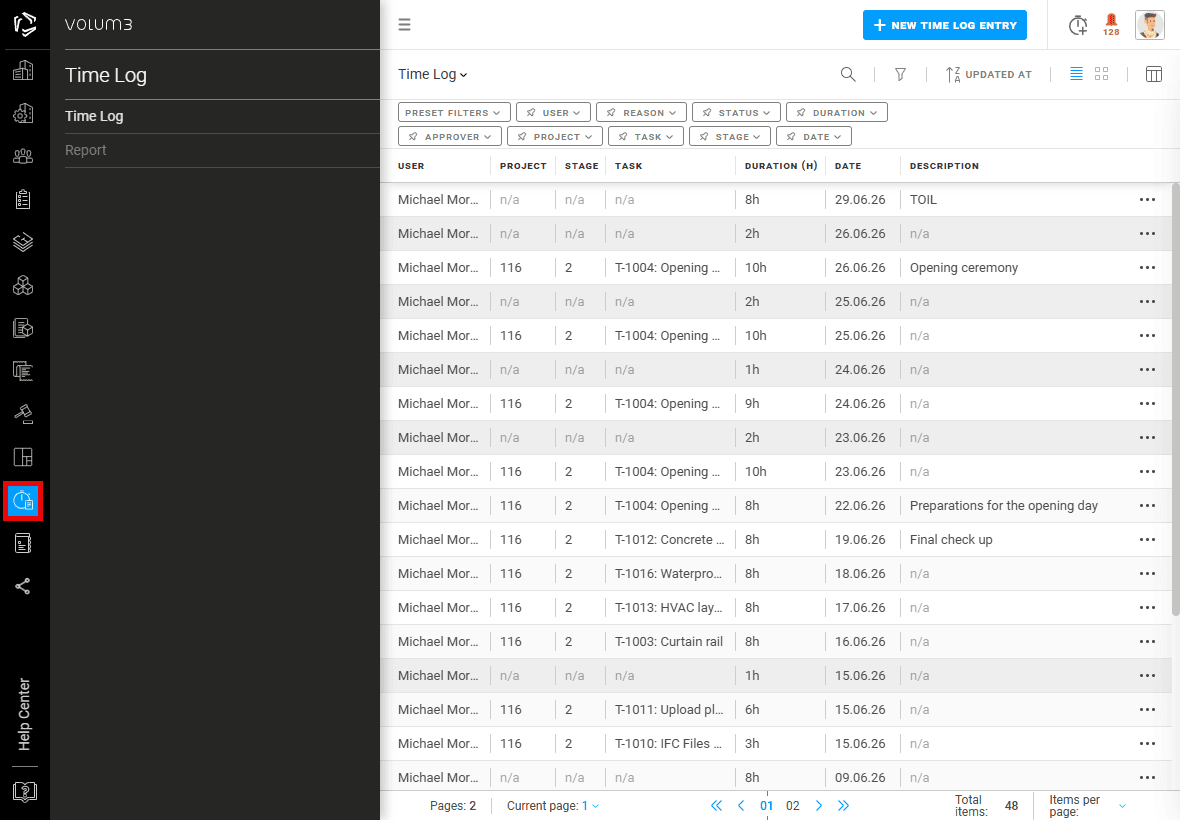
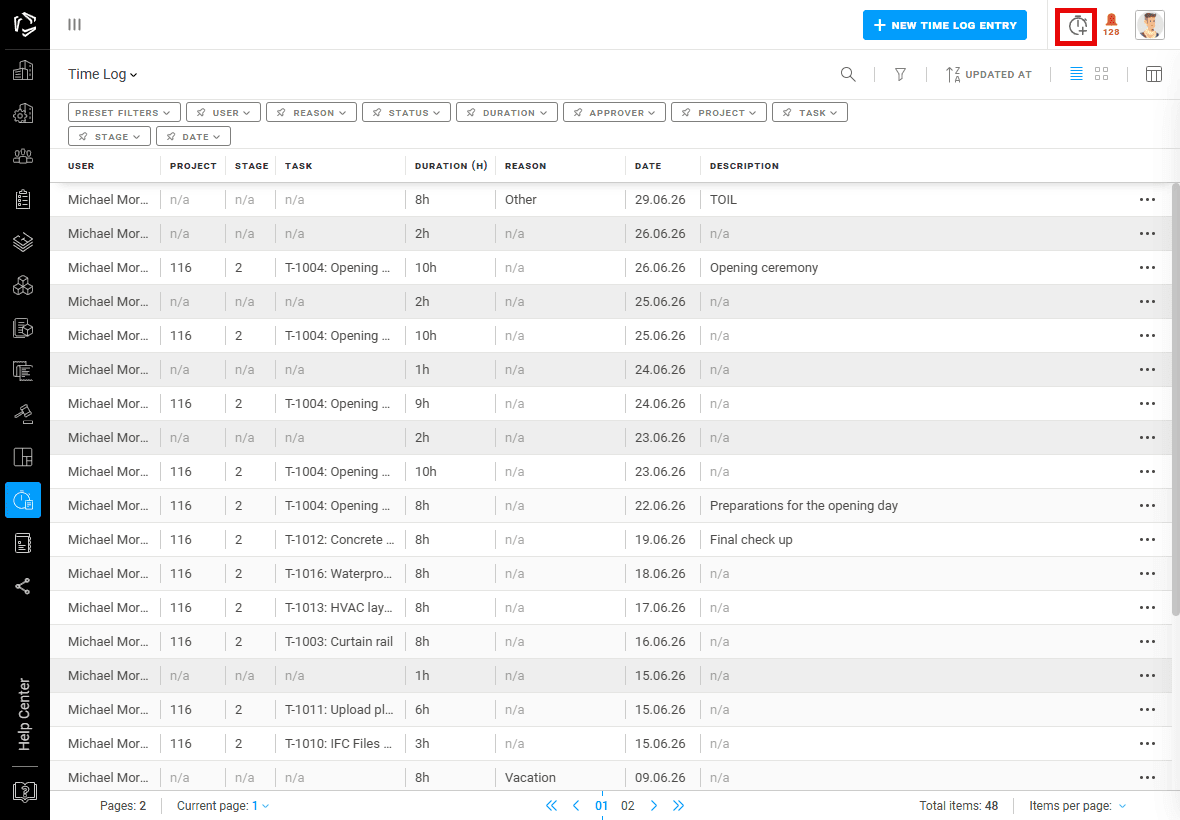
To access the Time Log module click on the stopwatch icon in the left menu.
Time Log list
When you enter the Time Off module, you will see a list of all time logs and submitted requests.
- Each log entry contains its date, description, linked task (if applicable) etc.
- Requests are displayed together with their current status so you can easily track approvals or rejections.
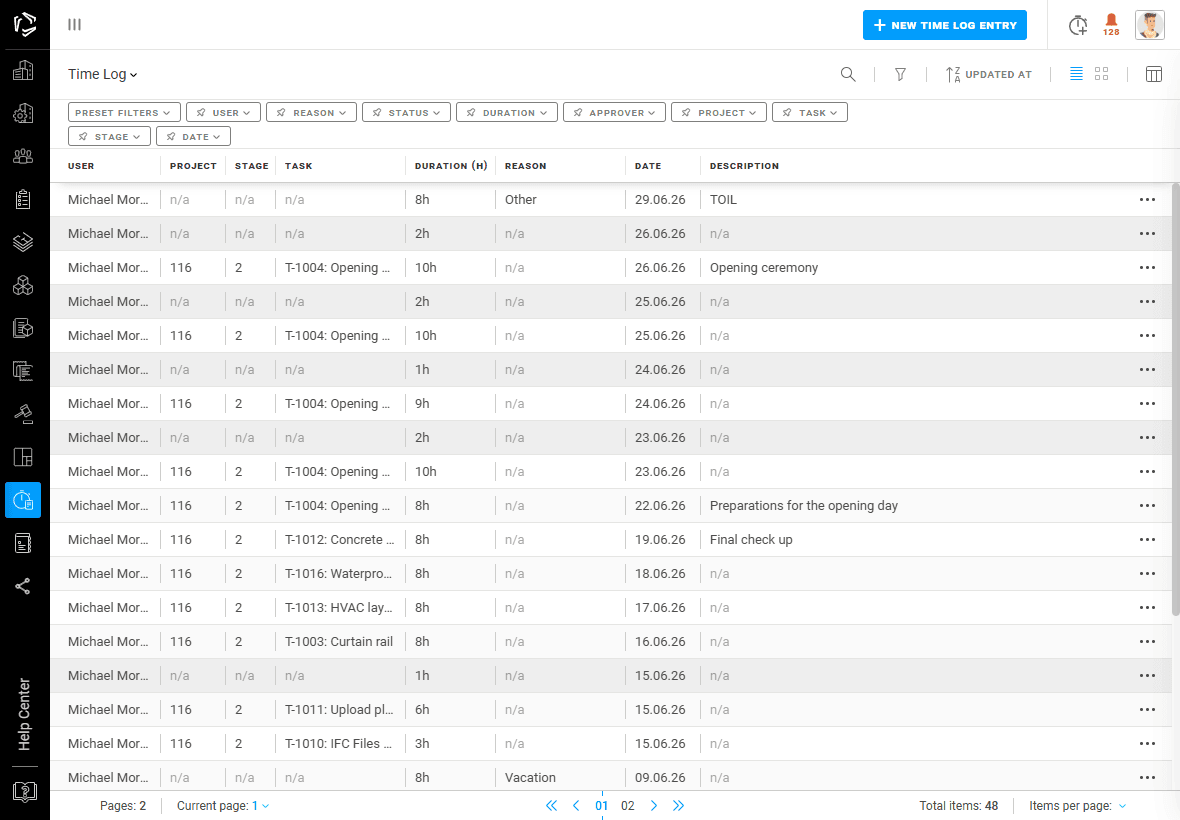
This overview gives both users and approvers a clear record of all activities related to time tracking and time off.
Log Time
The Time Log feature allows you to record how much time you’ve spent on specific tasks. It helps keep track of your work, improves team visibility, and supports accurate reporting. To access it, click on the stopwatch icon on the left.
How to Log Time in VOLUM3:
A) Log your time from modules
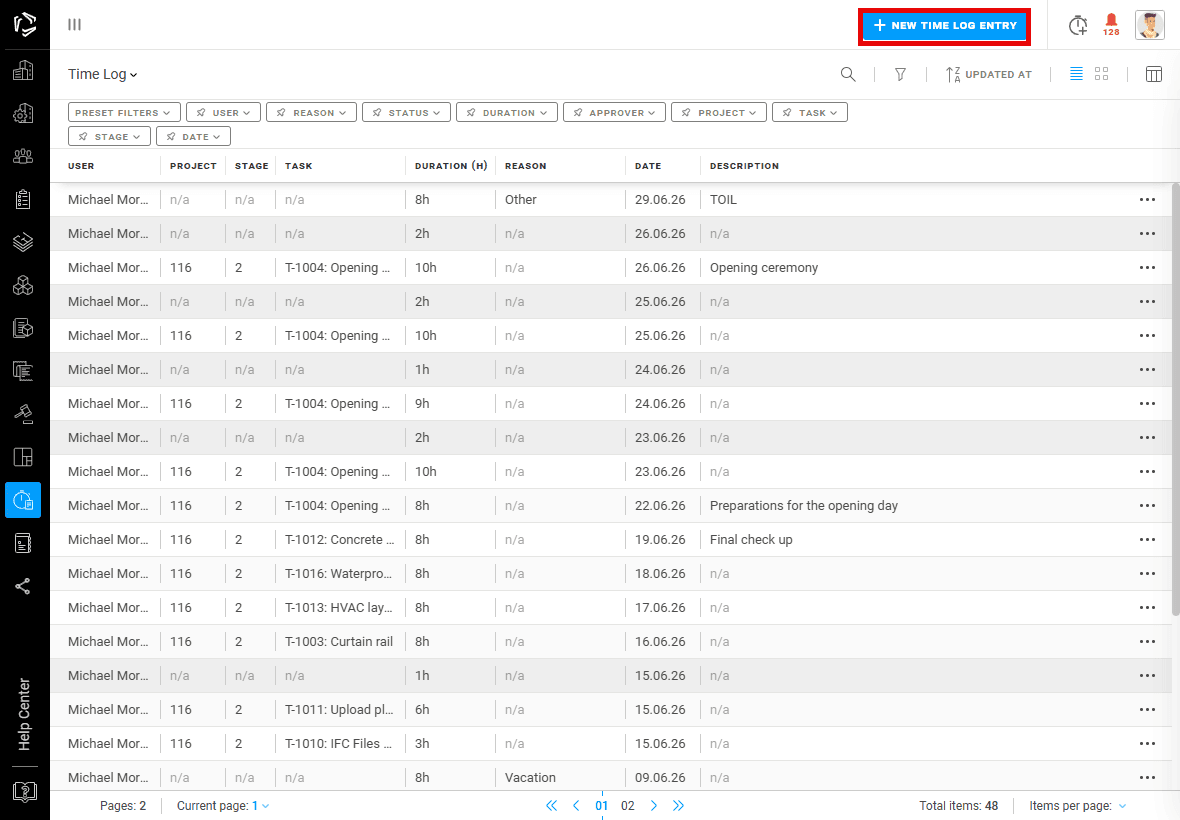
- Click “New Time Log Entry” in the Time Log module or topwatch icon in the top right corner from any module
- Select the task (optional)
Choose the specific task you worked on.
- Enter time
Enter the number of hours/minutes you worked.
- Add a short description (optional)
Write a brief note, like "Updated plans" or "Coordination meeting".
- Save the entry
Click Save to log your time.
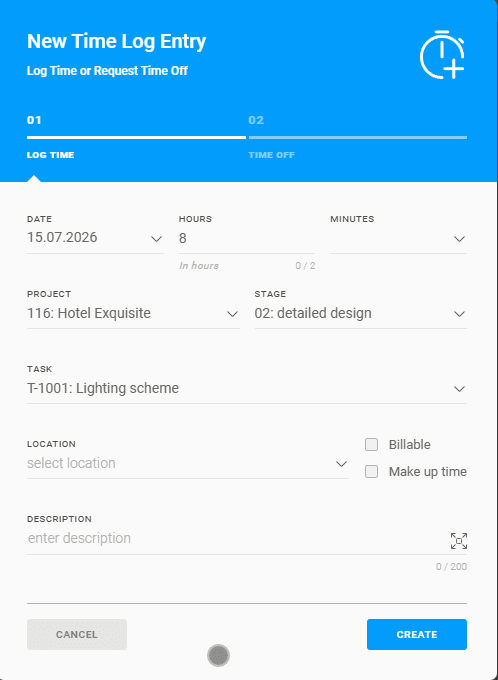
B) You can also log your time directly on the Task Flyout. To do that:
- Open the task where you want to log time.
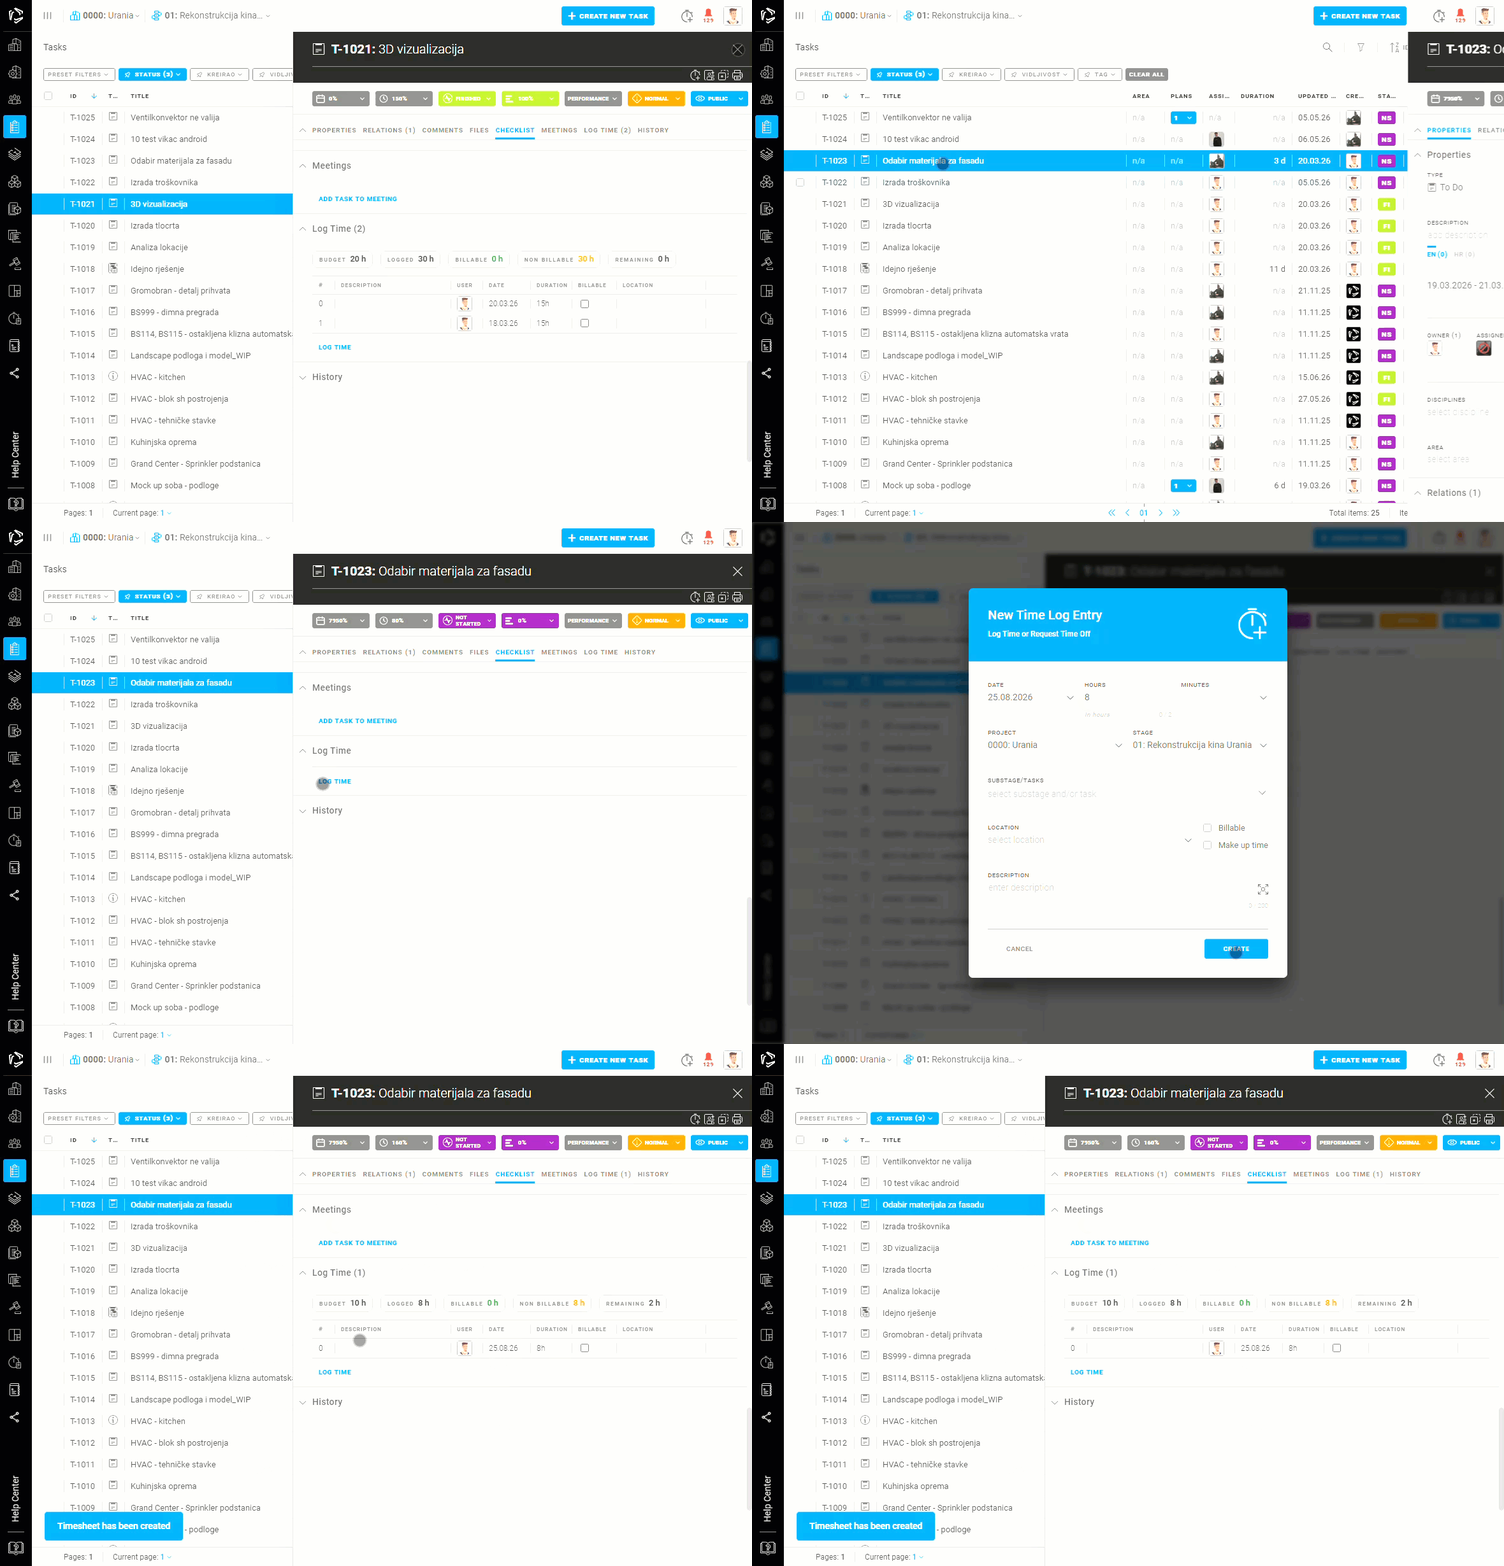
- Click the stopwatch icon on top right part of task flyout or scroll down to time tab and click Log Time button.
Request Time Off
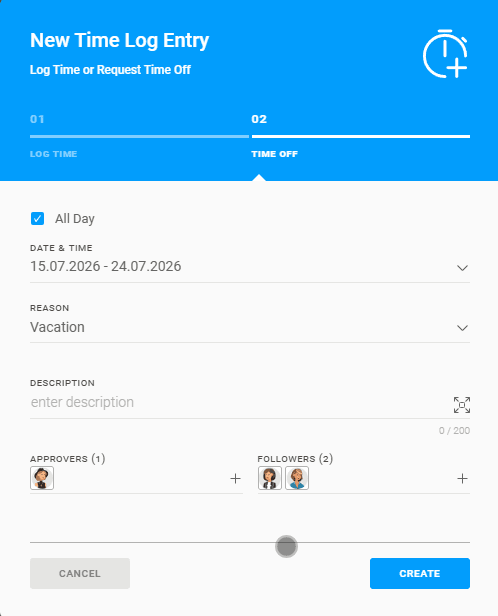
Easily plan your vacation, record sick leave, or request personal time away from the office. Each request is sent directly to your designated approver for review and approval, ensuring schedules remain clear, accurate, and well-organized.
How to Request Time Off in VOLUM3:
- Click “New Time Log Entry”
Select the Time Off button to start your request.
- Choose the type of leave
Pick from options like Vacation, Sick Leave, or Personal Time.
- Select the dates
Choose the start and end date for your time off.
- Add a description (optional)
You can include a short message or reason for the request.
- Submit the request
Click Submit to send it to your manager for approval.
Approve or Reject Time Off Requests
When an employee requests Time Off, the following process is triggered:
- The approver receives a notification both by email and within VOLUM3.
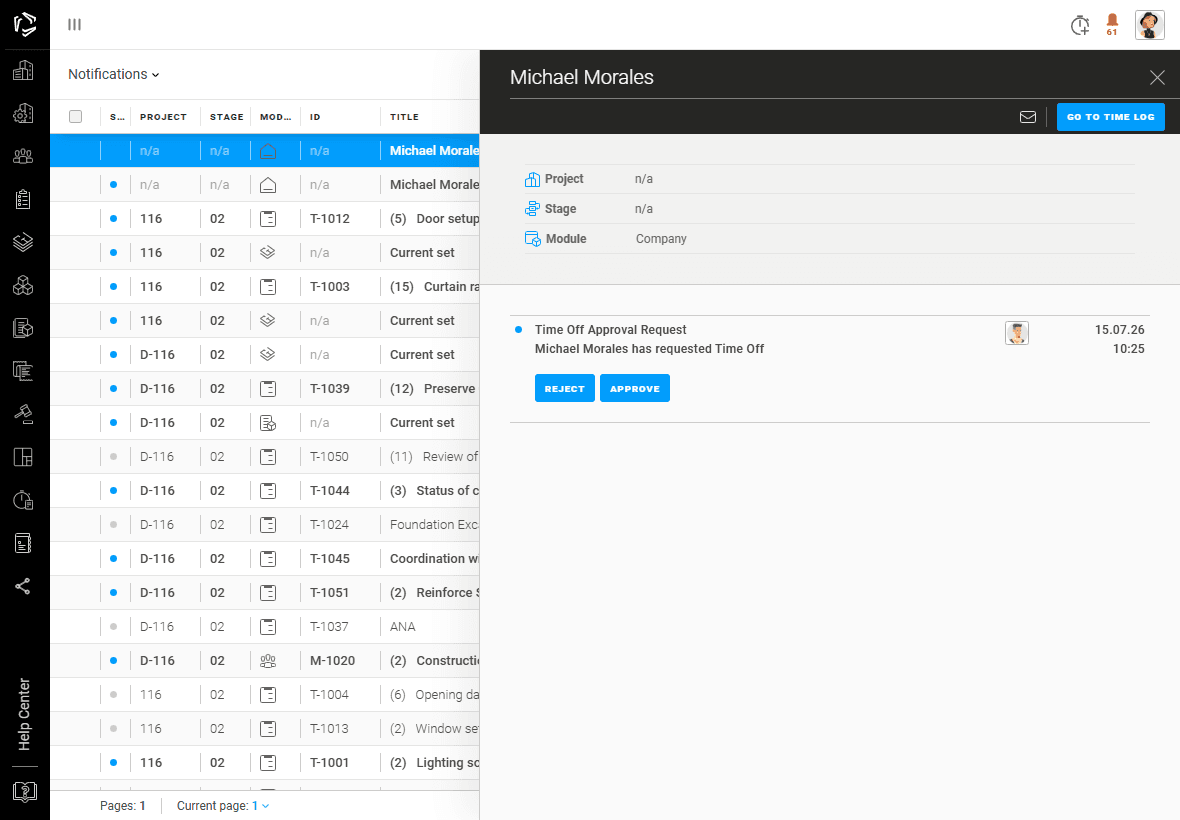
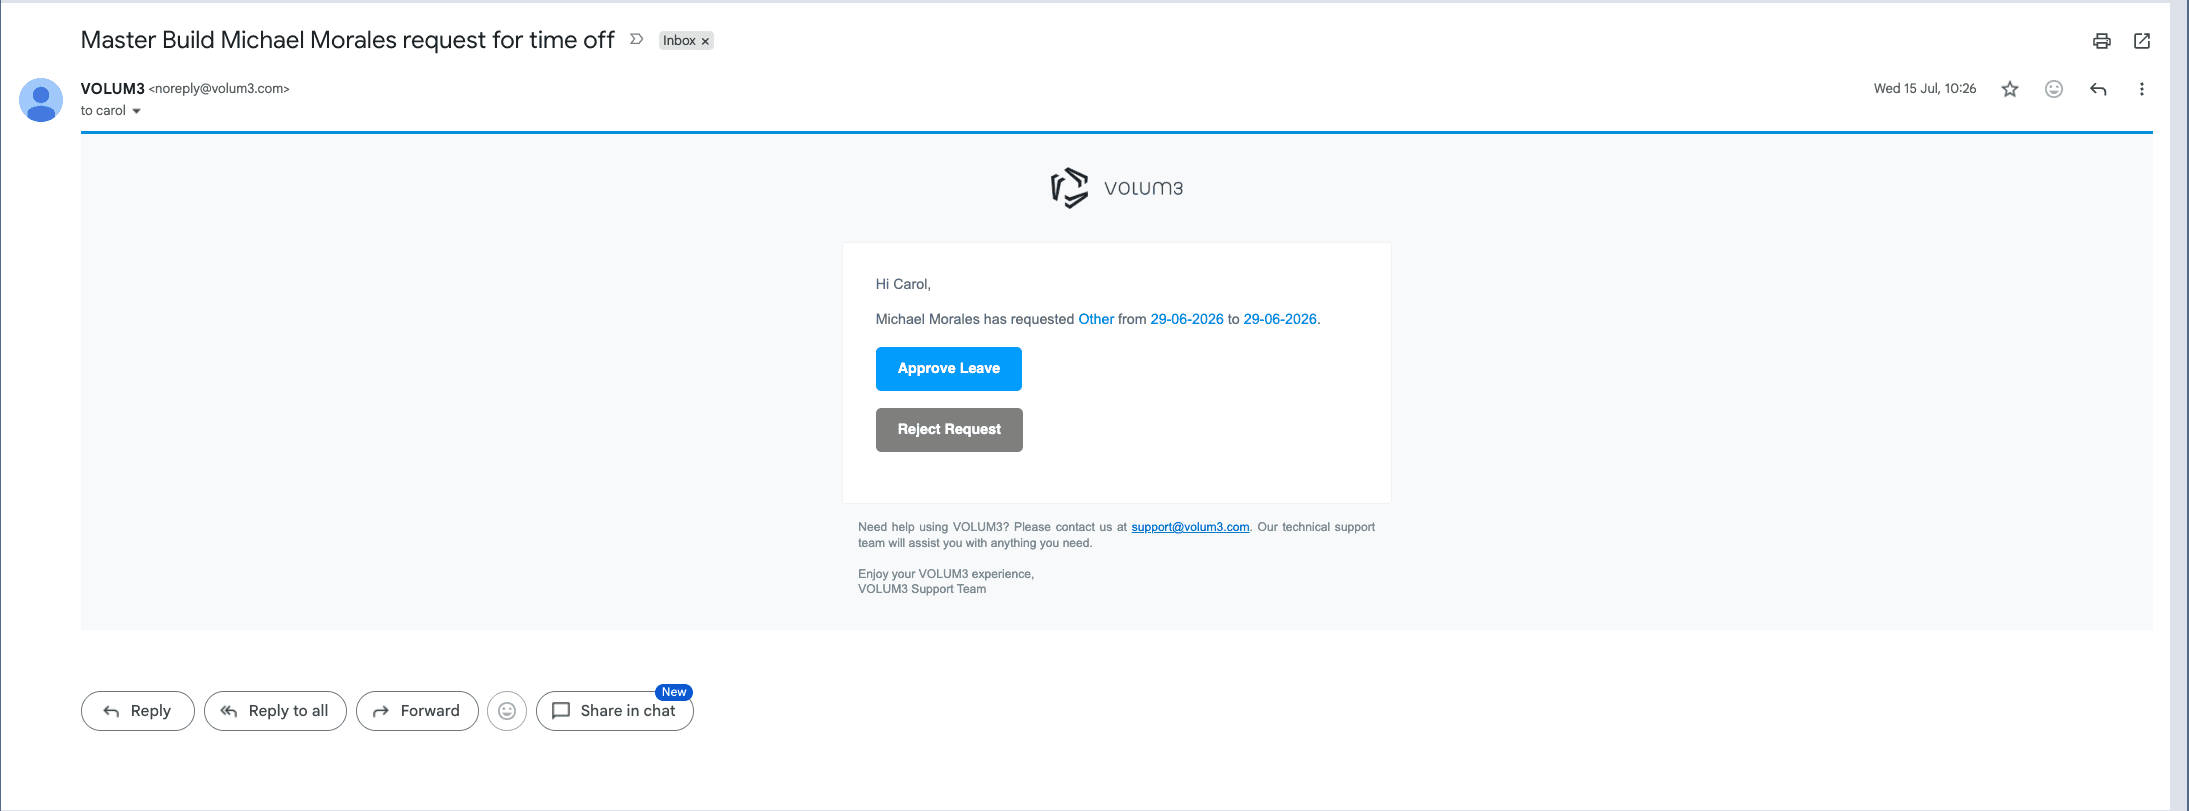
- The approver reviews the request and chooses to Approve or Reject by clicking the corresponding button.
- The requester is then notified of the decision (pending, approved or rejected) - the status is updated in their Time Log list.
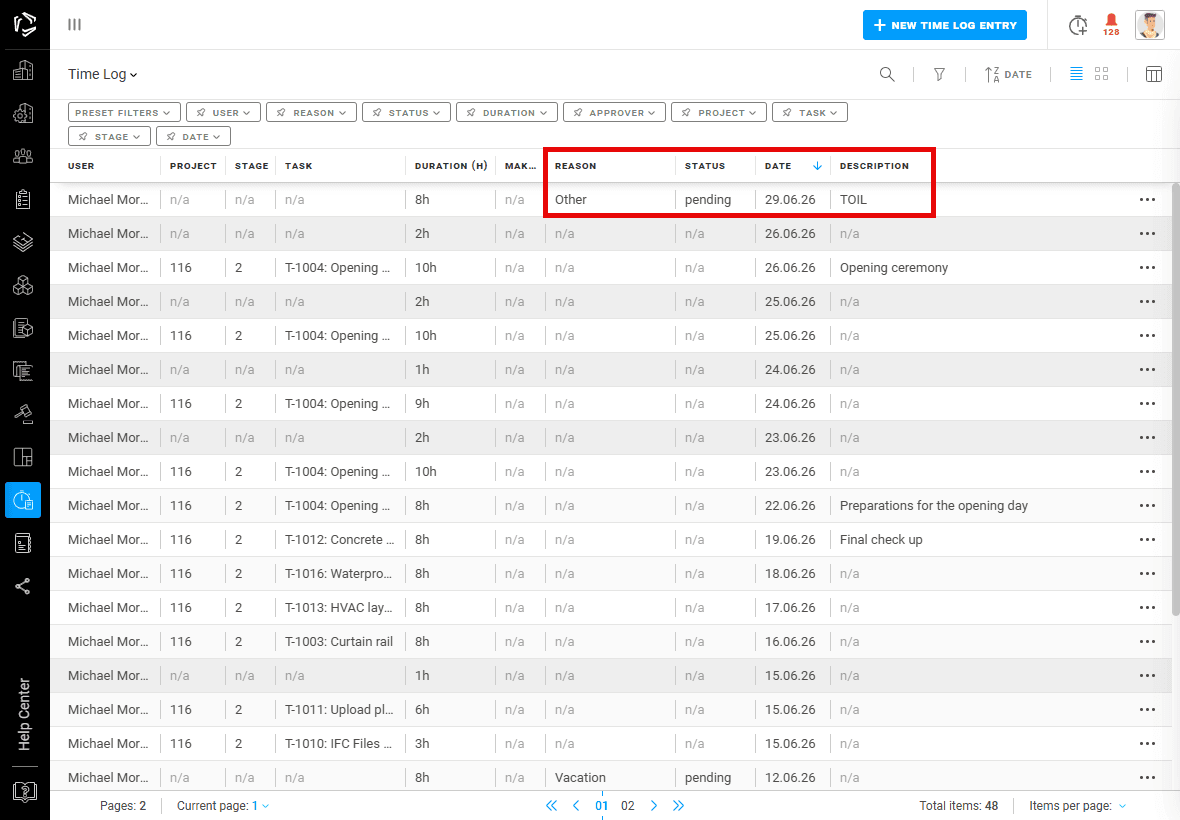
- The requester can always view the current status of their request within VOLUM3.
Status
Each Time Off request can have one of three statuses, visible in the Time Log list:
- Pending – the request has been submitted and is waiting for approval.
- Approved – the request has been reviewed and accepted by the approver.
- Rejected – the request has been reviewed and declined.
These statuses help both users and approvers easily track the progress and outcome of each request.
Time Report
The Report section gives a clear overview of logged work hours and time off. You can view data by person, project, or team, as well as see detailed contributions per person per project. Summarised totals make it easy to track overall progress, monitor workload, and estimate hours needed for future projects.
These insights allow you to track progress, monitor workload distribution, and better estimate future hours needed for similar projects.
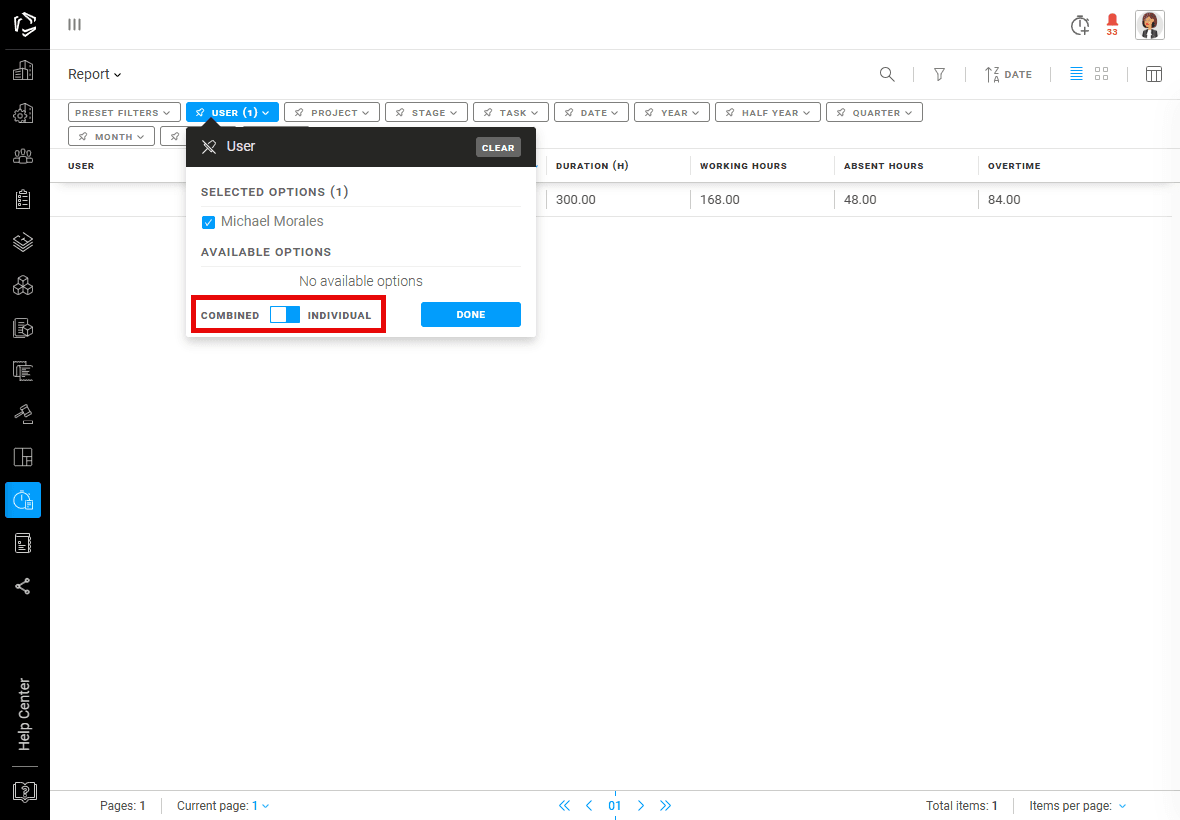
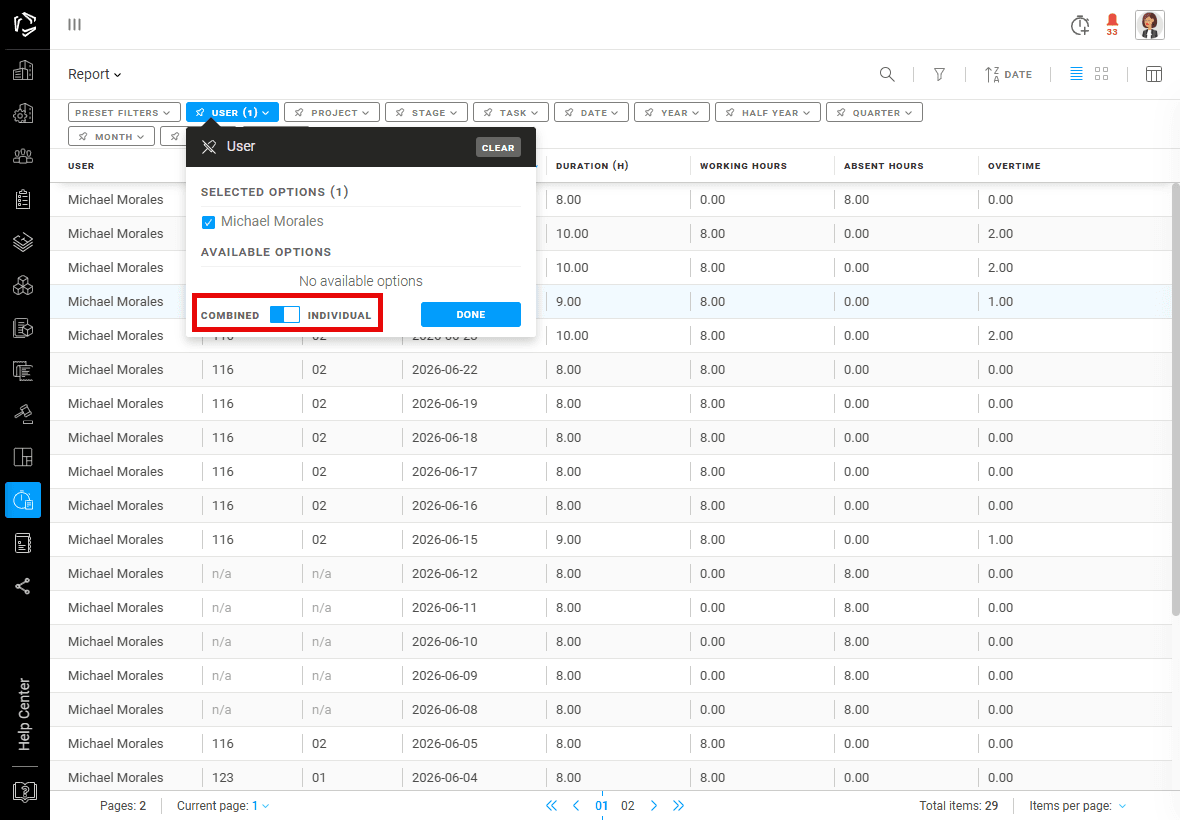
Use Filters to get the information you need in seconds.
Select combined or individual in each filter to get the result you want (white is the selected option, blue is the one that is not selected)
Filters
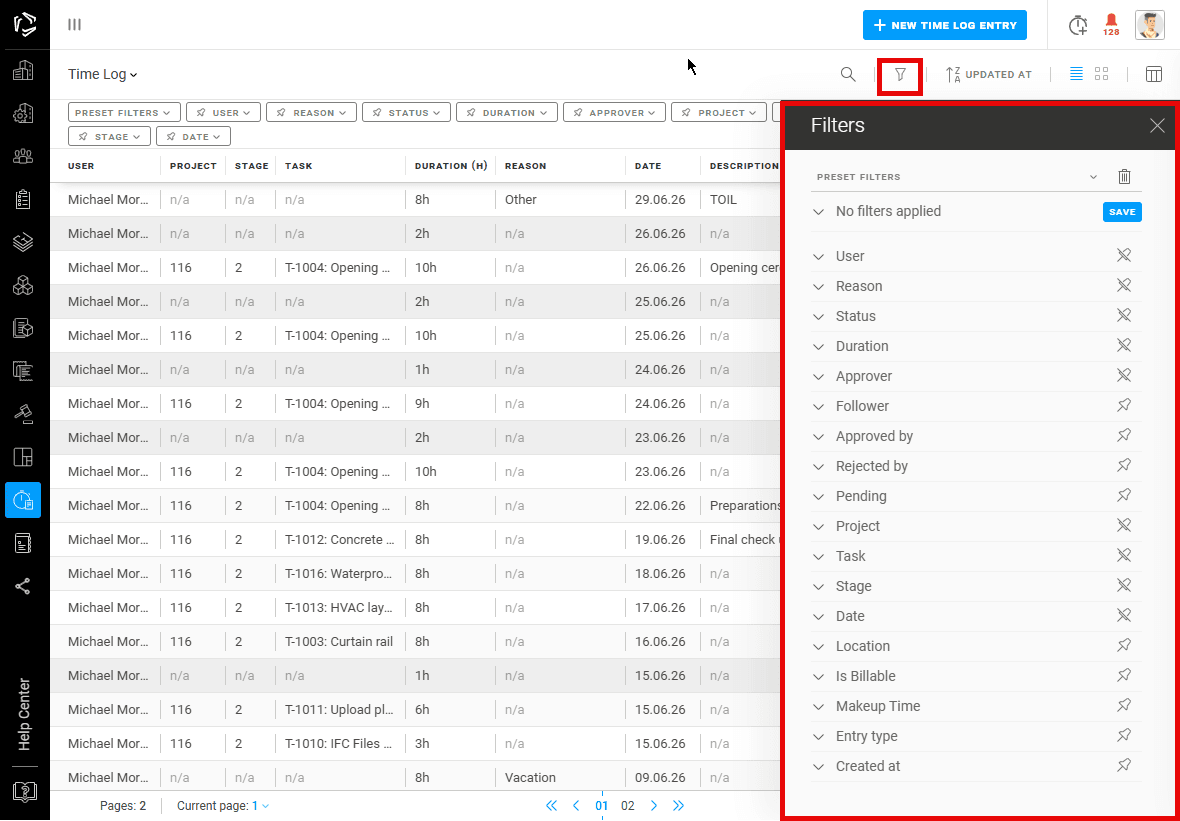
The Time Log module provides multiple filters to help you quickly find and organize entries. Access filters by clicking the funnel icon in the upper-right corner and pin frequently used ones to keep them on the toolbar. Use Clear All to reset your selections.
Available filters:
- User – filter by the person who logged the time.
- Reason – filter by the reason for the time entry.
- Status – filter by request status: Pending, Approved, or Rejected.
- Duration – filter by the length of the time entry.
- Approver – filter by who needs to approve the entry.
- Approved by / Rejected by – filter by who approved or rejected the request.
- Project – filter by project name.
- Task – filter by specific task linked to the entry.
- Stage – filter by project stage.
- Date / Period – filter by specific dates or periods.
- Location – filter by entry location.
- Is Billable – filter by billable vs non-billable entries.
- Makeup Time – filter by makeup time entries.
- Entry Type – filter by the type of time entry.
These filters allow you to easily sort, review, and analyze all logged time and requests.
Search
The search bar is located in the top-right corner of the screen. Simply enter your text to quickly find the information you need.
Editing
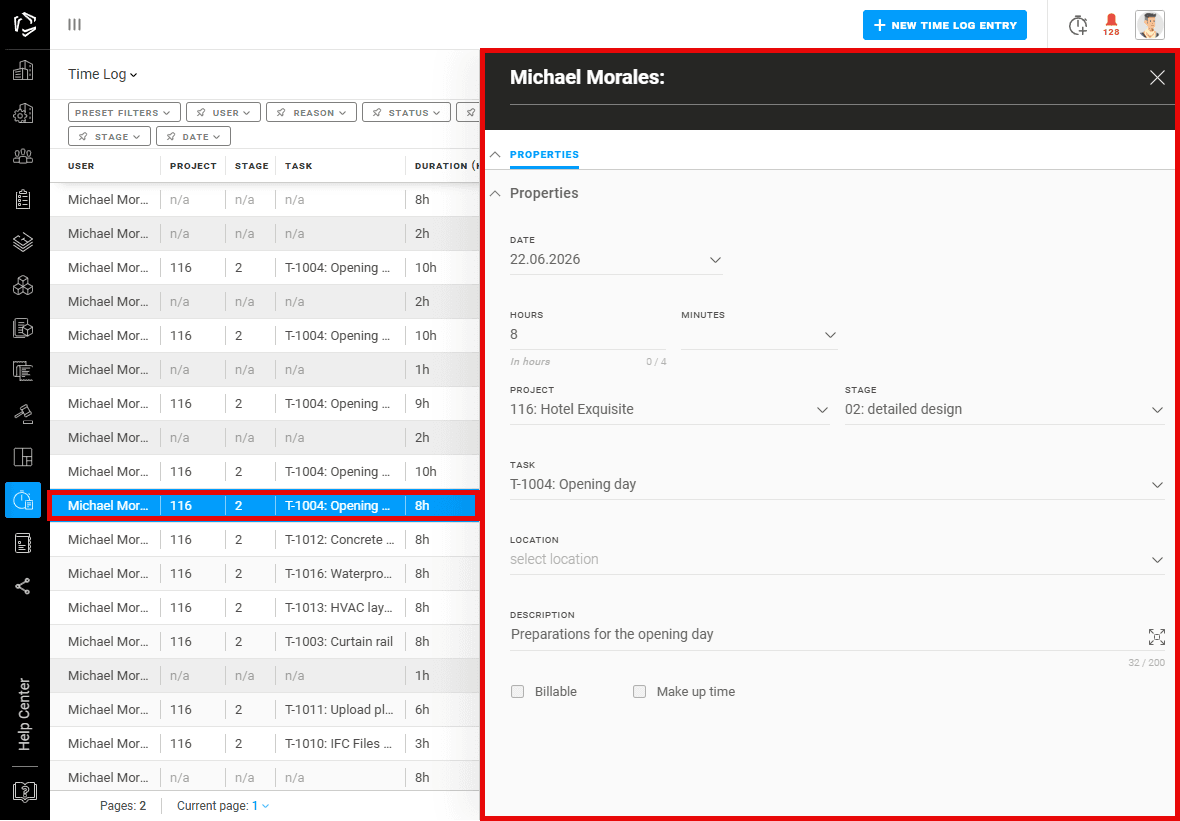
You can edit any entry by clicking on it. This will open a flyout, there you can update or modify all available fields.
Notifications
You can choose to receive alerts, emails, or digest notifications whenever there is an update or change to the Time Log.
Time Off Approver added: Receive a notification when you have been added as a time off approver.
Time Off Follower added: Receive a notification when you have been added as a time off follower.
Time Off Approved: Receive a notification when a time off request has been approved.
Time Off Rejected: Receive a notification when a time off request has been rejected.
Weekly Timesheet Introduction
Week View is a part of the Time module that allows users to review, enter, and manage working hours and time off in a weekly table.
It gives users a clear overview of the selected week, including work time, time off, overtime, makeup time, billable and non-billable hours. Instead of entering time only through individual time log forms, users can manage their weekly timesheet directly in one structured view.
Accessing Weekly Timesheet
To access Weekly Timesheet, open the Time module from the main navigation and select Weekly Timesheet.
The Weekly Timesheet screen opens with the logged-in user selected by default. If you have the required permissions, you can select another user from the dropdown menu at the top of the screen.
Screen Overview
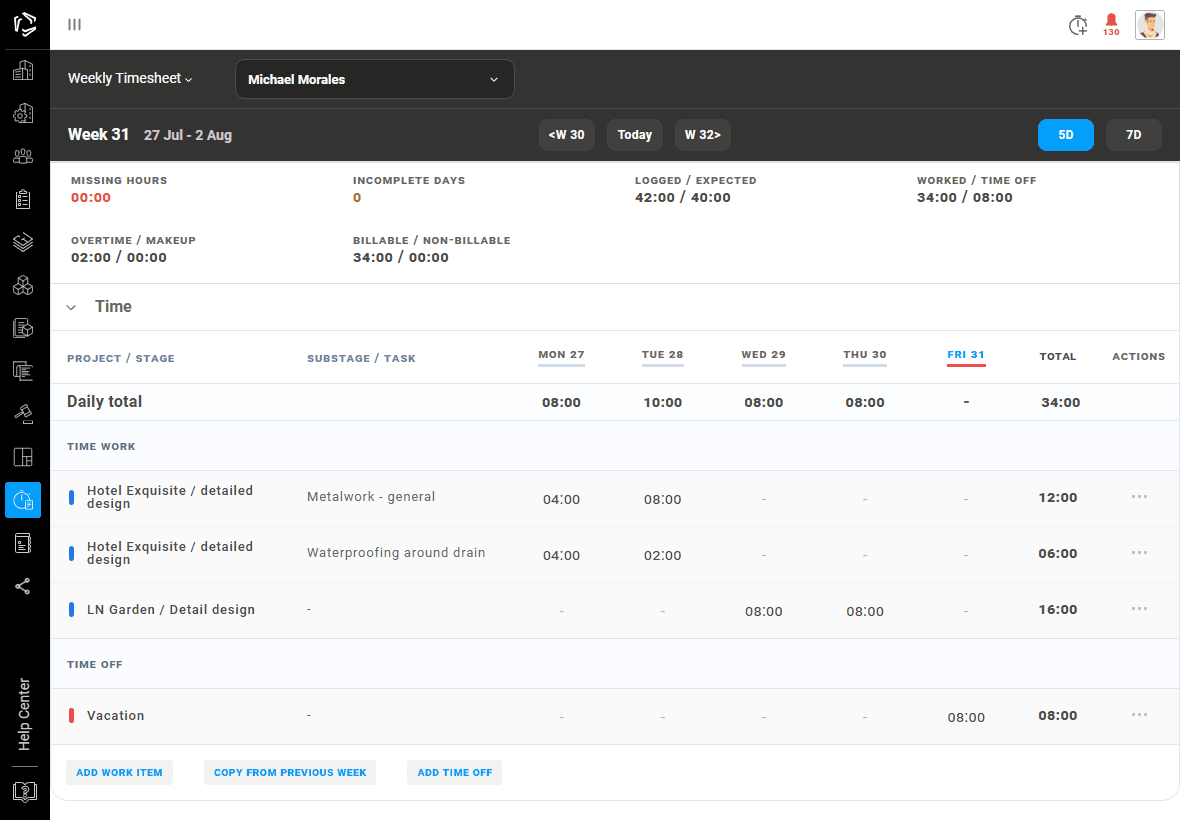
The Weekly Timesheet screen consists of several main areas:
- Week header – shows the selected week, date range, and navigation between weeks.
- User selector – allows switching between users, depending on your permissions.
- Statistics bar – shows a summary of the selected week.
- Time table – displays work items, entered hours, time off, and daily totals.
- Action buttons – allow users to add work items, copy entries from the previous week, or add time off.
Week Header
The header shows the currently selected week and its date range.
Users can move between weeks using the previous and next week buttons, or quickly return to the current week by clicking Today.
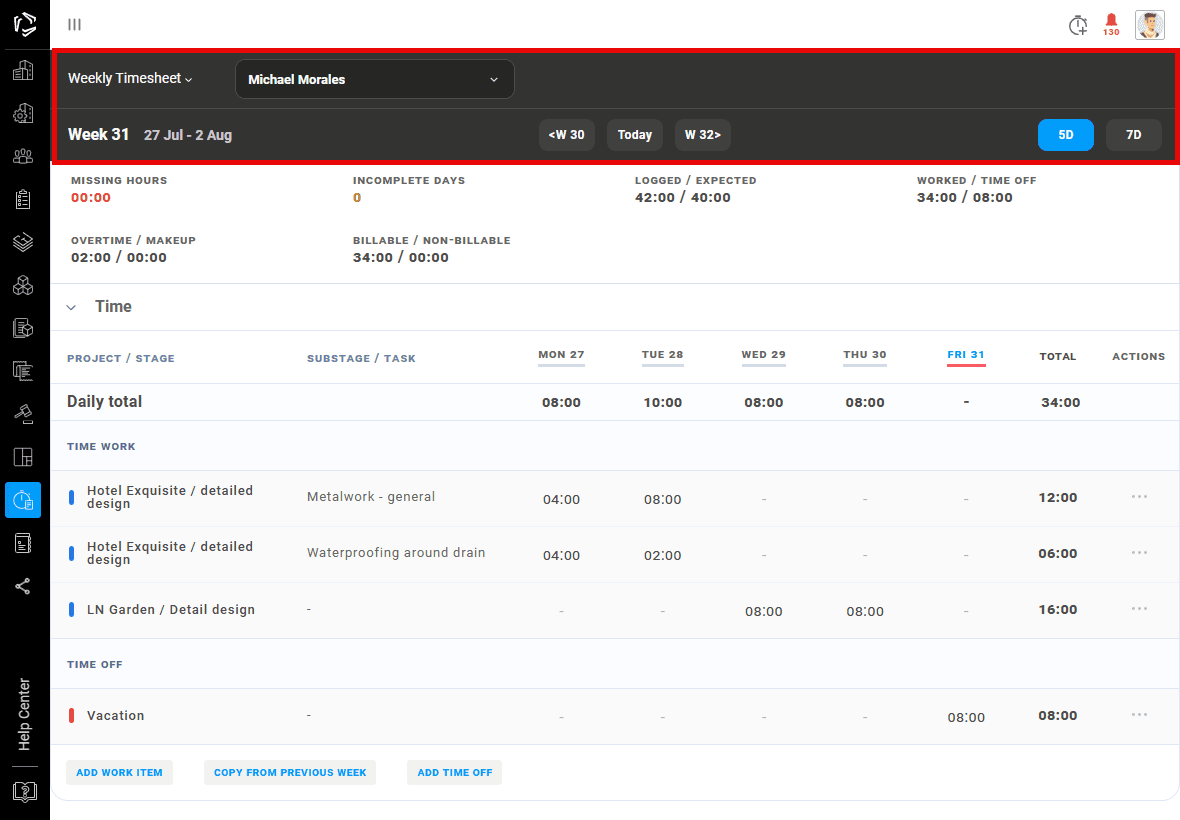
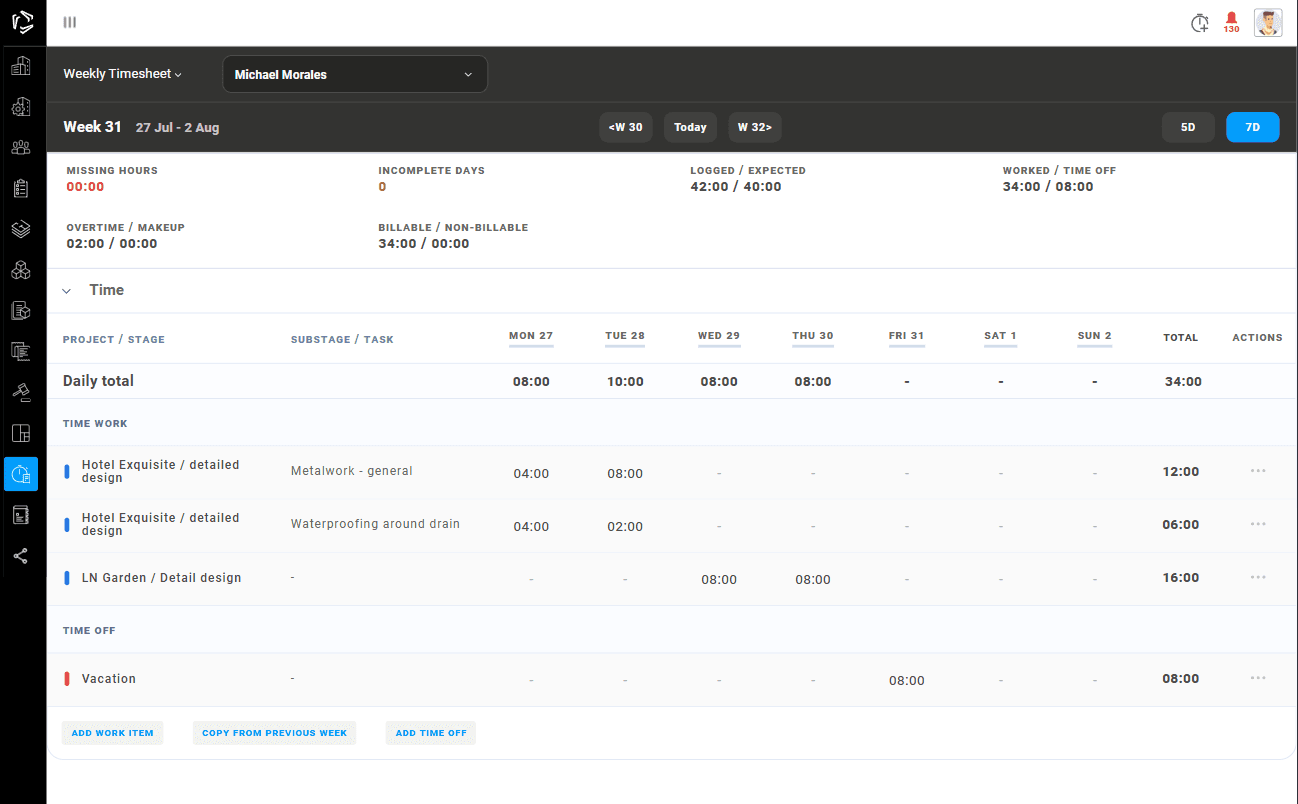
The view switcher allows users to change how many days are displayed in the table, such as 5D or 7D.
User Selector
The user selector shows whose timesheet is currently displayed.
By default, users see their own timesheet. Users with additional permissions can select another team member and review or manage their Week View.
When another user is selected, new work time or time off entries are created for that selected user.
Statistics
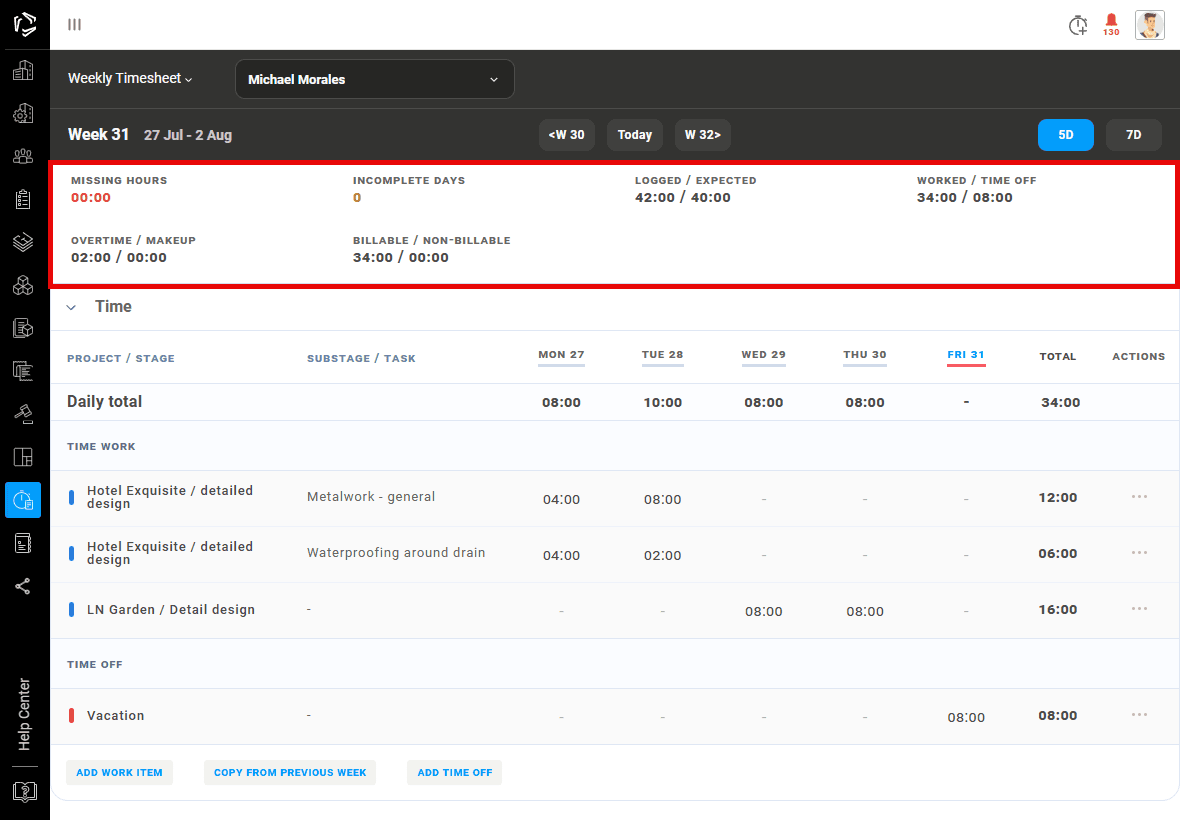
The statistics bar gives a quick summary of the selected week.
- Missing Hours shows how many expected working hours have not yet been entered.
- Incomplete Days shows how many days are not fully completed.
- Logged / Expected compares the total logged hours with the expected working hours for the selected period.
- Worked / Time Off shows how many hours were entered as work time and how many as time off.
- Overtime / Makeup shows overtime hours and makeup time.
- Billable / Non-billable shows how many logged hours are billable and how many are non-billable.
All time values are displayed in hours and minutes.
Work Items
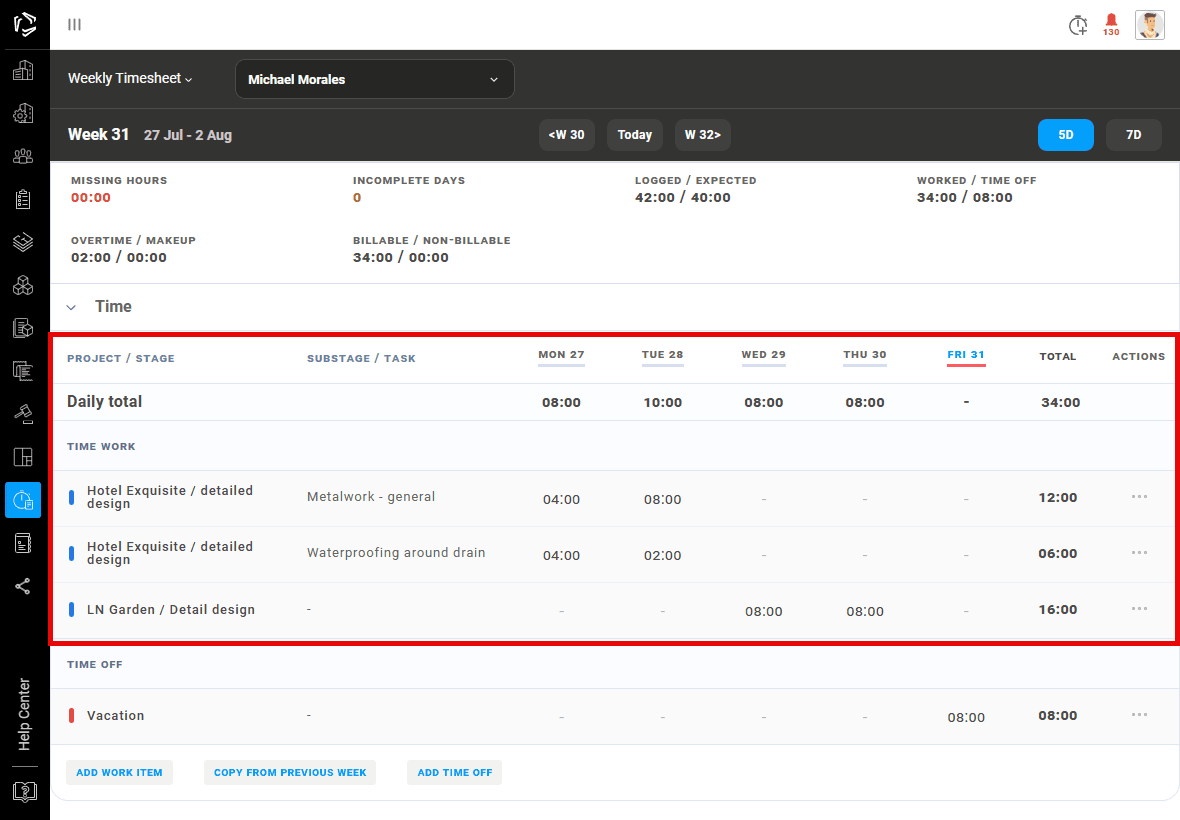
Work items represent the projects, stages, substages, or tasks on which the user worked during the selected week.
Each row shows the selected project and stage, with optional substage or task information. Hours can be entered for each day directly in the table.
If the same work item is used across multiple days, it remains visible as one row, making weekly time entry faster and easier.
Time Off
The Time Off section displays absence entries for the selected week.
Time off can be entered as a full-day absence or as a partial-day absence with a specific number of hours and minutes.
Examples of time off include paid leave, sick leave, compensatory time off, or other absence reasons defined by the company.
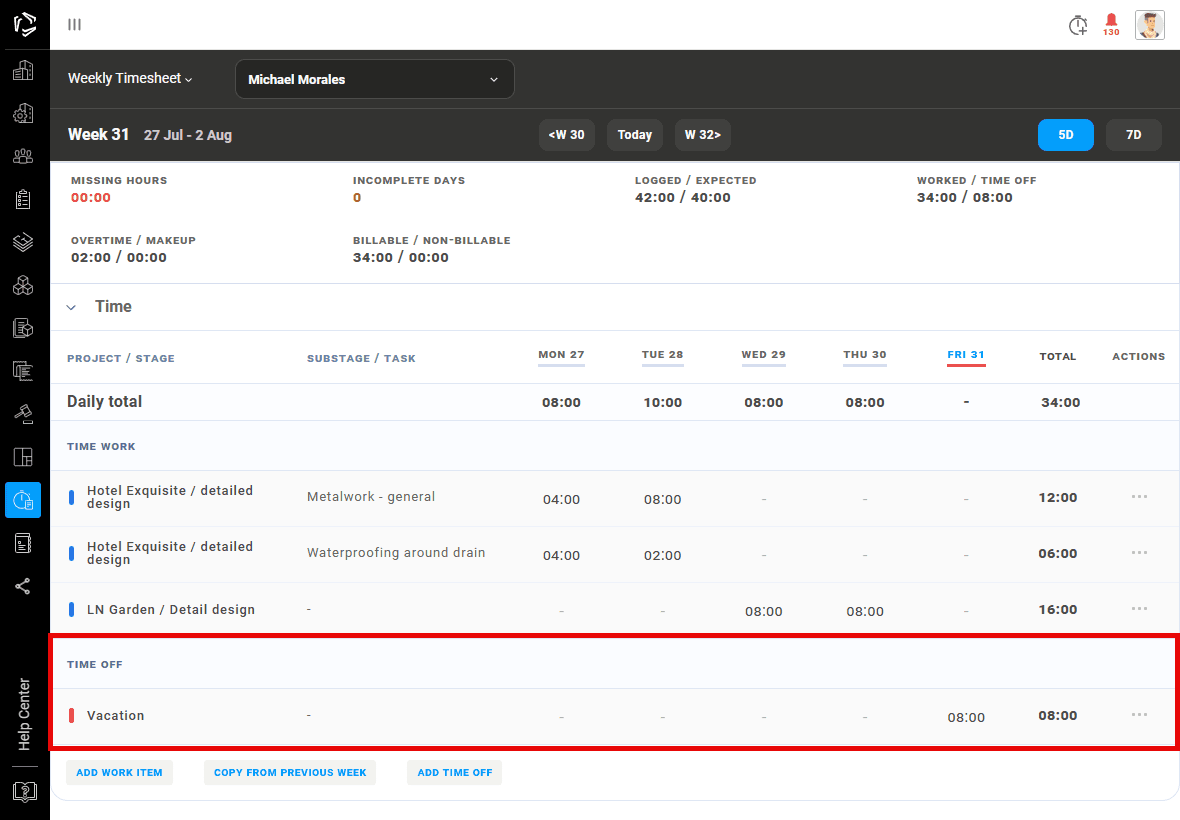
Daily Totals
Daily totals summarize all entered work time and time off for each day.
When a user edits or adds hours, the daily total is updated automatically. This helps users quickly check whether each day has been completed correctly.
Add Work Item
Click Add Work Item to add a new work row to the selected week.
The New Time Log Entry window opens with the Log time form. The selected date range is shown at the top of the form and represents the period for which the work item will be added.
Users must select a Project and Stage. Substage and Task selection is optional. If needed, users can open the Substage/tasks dropdown, search available options, and select one or more related substages or tasks.
After the work item is created, it appears as a new row in the Week View table. Users can then enter working hours directly into the daily fields.
Add Time Off
Click Add Time Off to add an absence entry to the selected week.
The New Time Log Entry window opens with the Time Off form. Users can choose whether the time off is entered as All Day or as a partial-day absence.
When All Day is selected, users only need to select the date or date range, choose a reason, and optionally add approvers and/or followers and a description.
When All Day is not selected, users can enter a specific date, hours, minutes, reason, and description. This is useful for partial-day absences, such as a few hours of leave.
The Reason field is required. Available reasons can include Other, Paid leave, Parental leave, Sick leave, TOIL(Time Off in Lieu ), Unpaid leave, and Vacation.
After the time off entry is created, it appears in the Time Off section of the Week View table.
Copy From Previous Week
The Copy from Previous Week action copies work items from the previous week into the selected week.
This is useful when users work on the same or similar projects, stages, substages, or tasks over multiple weeks.
If there are no entries in the previous week, the system will show a message that no previous week entries are available.
Editing Hours
Hours and minutes can be edited directly in the table.
Click into a time field and enter the required value. The system saves the entered time and updates totals and statistics.
Users can also open an edit modal for more detailed changes, depending on the type of entry.
Editing Work Time
Work time entries can be edited through the table or through a dedicated edit modal.
The edit modal allows users to review and change the selected work time entry, including hours and minutes for the selected day.
Editing Time Off
Time off entries can be edited through a dedicated modal.
For partial-day time off, users can edit hours, minutes, reason, and description.
For full-day time off, the date is shown but cannot be changed from the inline table. Reason and description can still be updated when allowed.
Delete Work Item
Users can delete a work item from the Week View if it is no longer needed.
A confirmation modal appears before deleting the item.
If hours have already been entered for that work item, the row cannot be deleted until the entered hours are removed. This prevents accidental loss of timesheet data.
Entering 0 also deletes the current entry.
Holidays
Holiday information is displayed inside Week View.
When a selected day is a holiday, the table visually highlights that day and shows the holiday name. This helps users understand why expected hours may be different for that day.
Holidays must be manually entered in company settings.
Permissions
Regular users can access and edit their own Week View.
Users with additional permissions can select other users and manage their timesheets, depending on company and project settings.
Some actions may be disabled if the user does not have the required permission or if the selected entry cannot be edited.
Time

Trg E. Kvaternika 3/3, 10 000 Zagreb, Croatia
+ 385 1 333 1909 info@volum3.com