
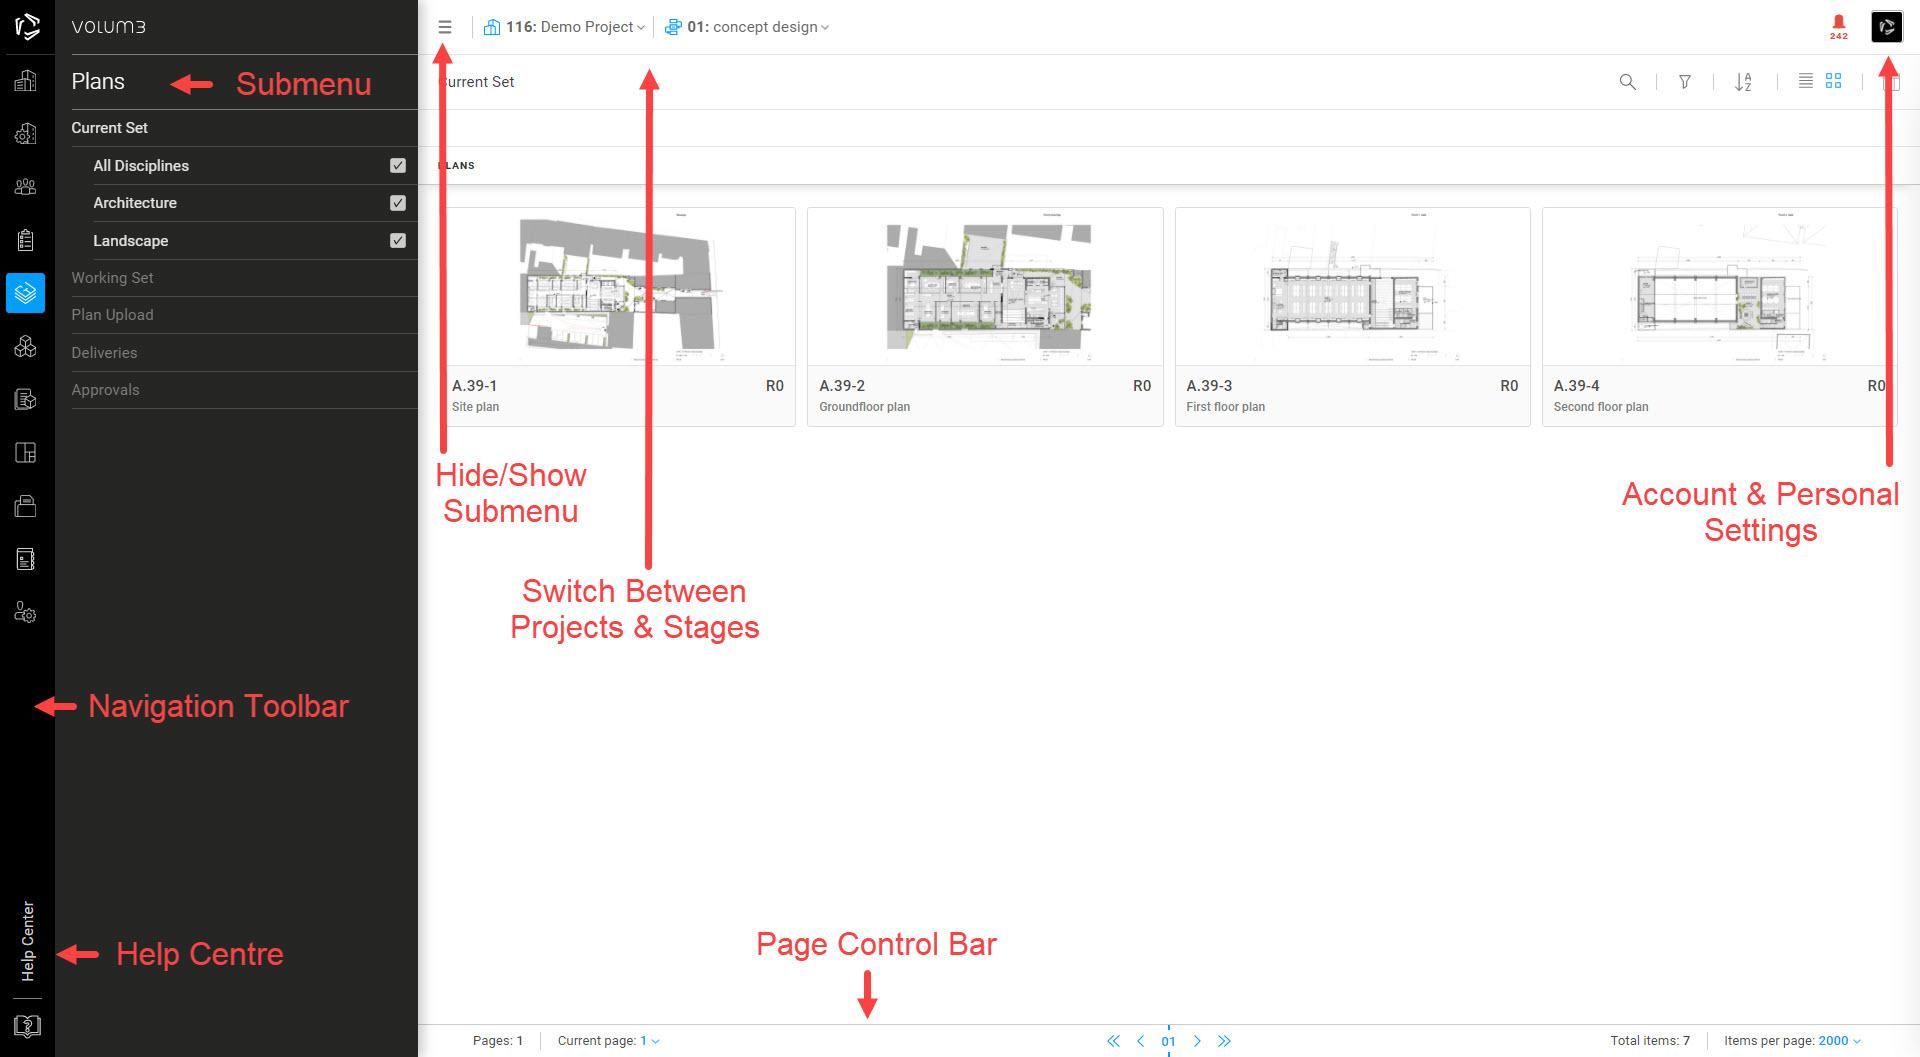
Navigation toolbar
Use the toolbar on the left to navigate around the website and to access and manage your projects:
- Project List
- Project Settings
- Meetings
- Tasks
- Plans
- Products
- Specifications
- Areas
- Companies & Users
Use the icon next to the toolbar to show or hide the submenu. Click the question mark icon in the bottom left corner to access Help Centre.
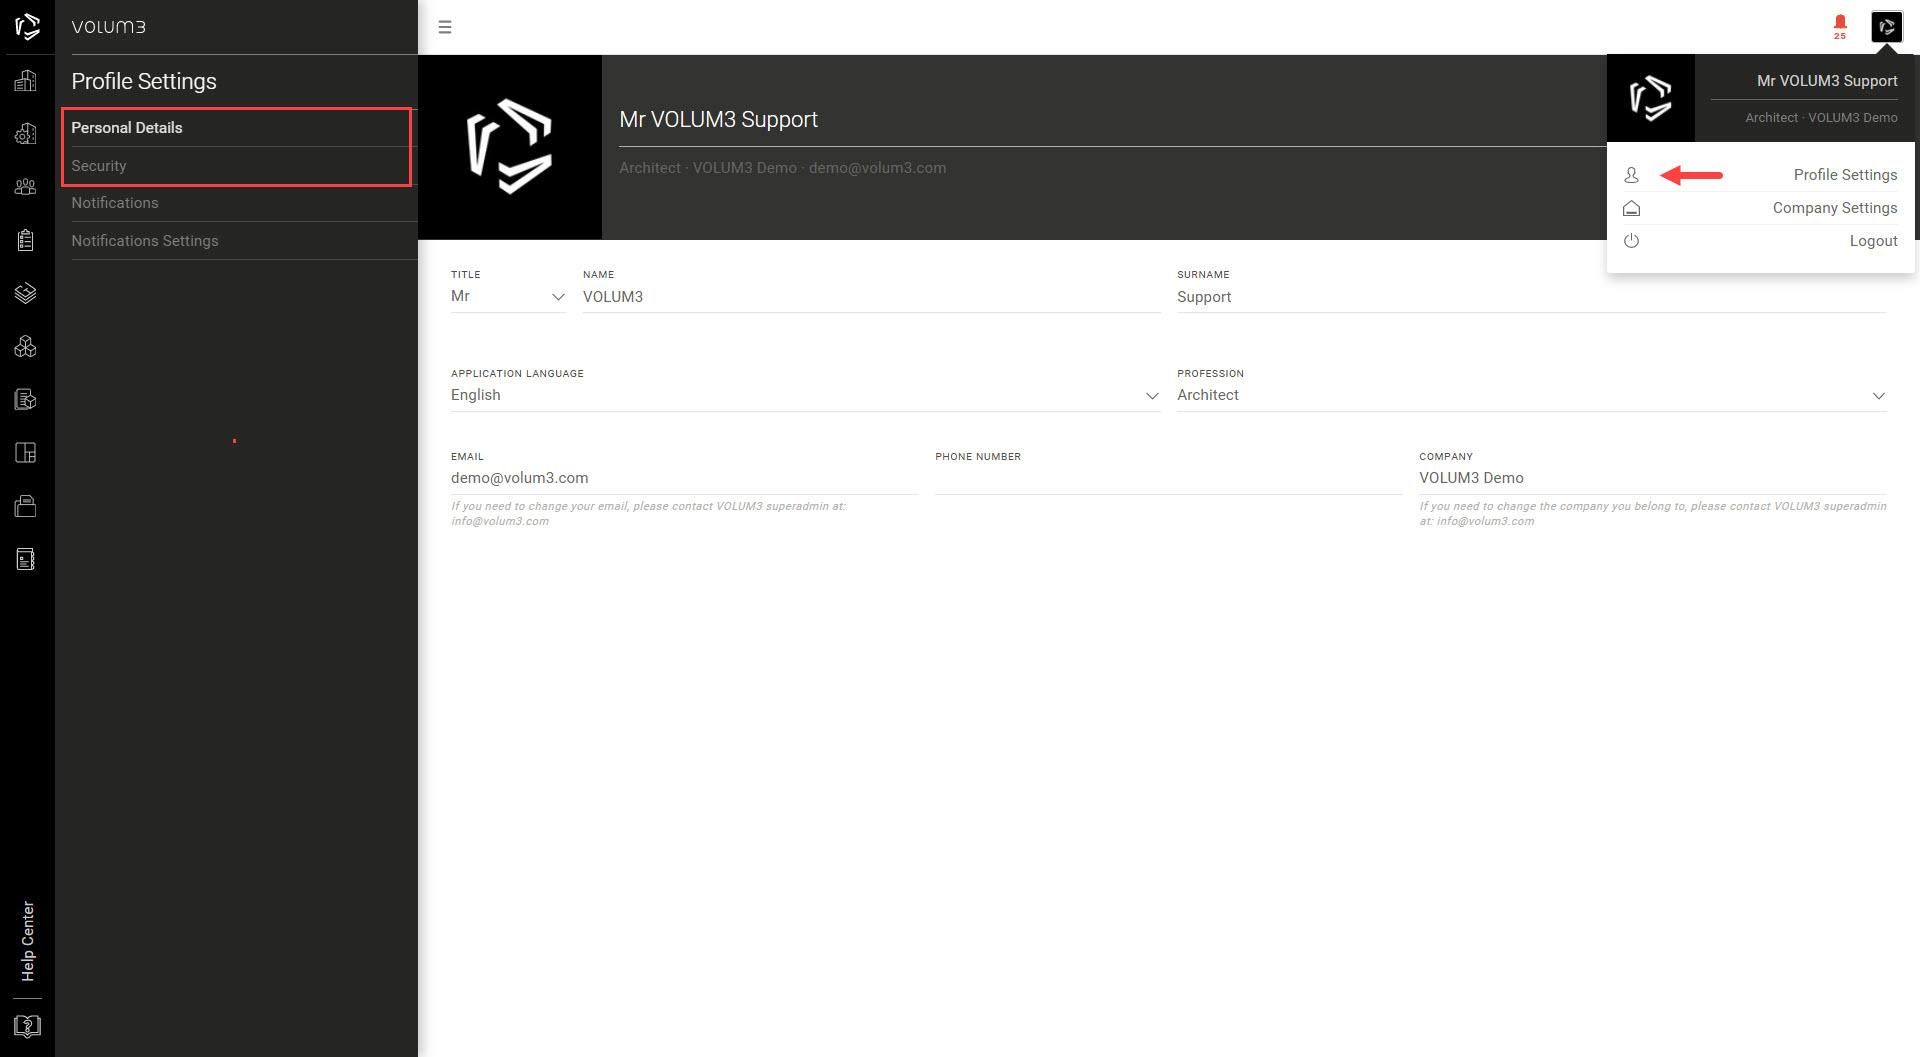
Accessing your personal settings
Click on the icon in the upper right corner to manage your settings.
Choose between different sections in the navigation menu on the left. In the Personal details page, edit your personal details (name, phone number, password..) and set the language you want to use VOLUM3 on.
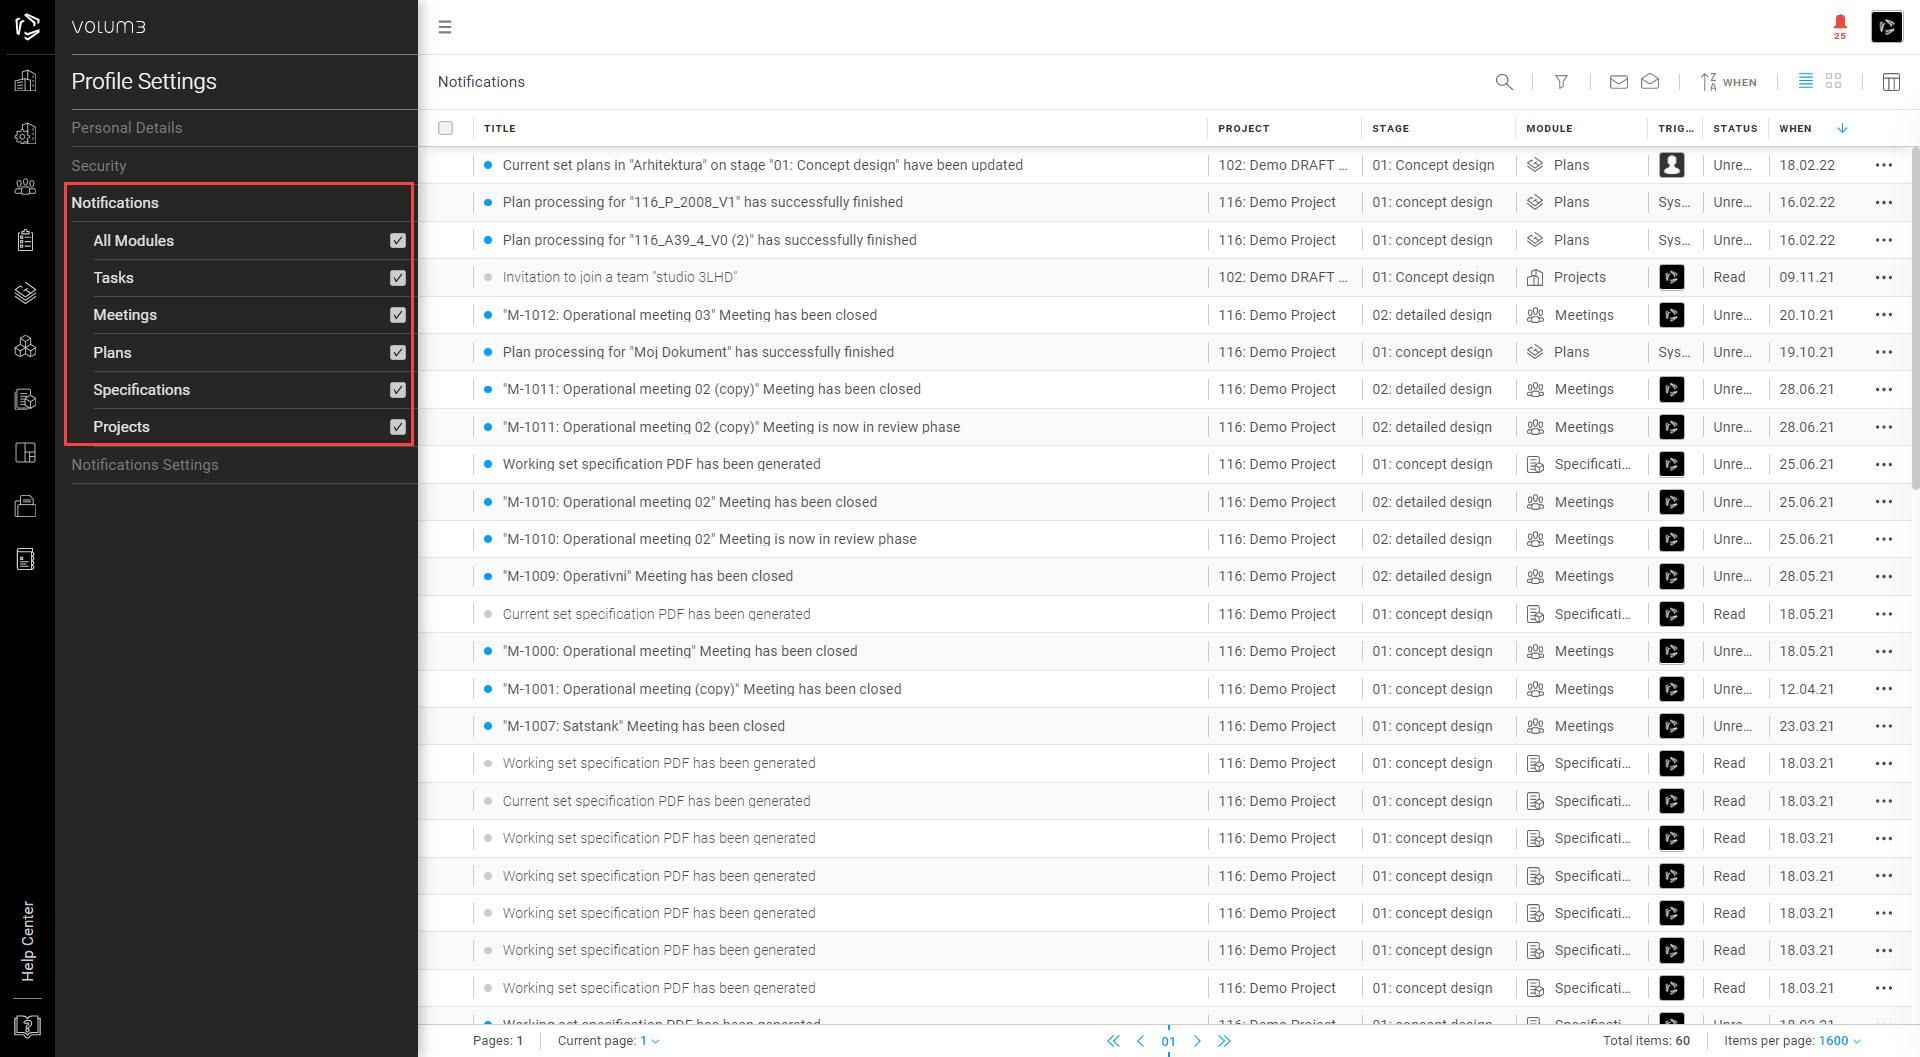
In Notification settings tick the checkbox next to the notification you want to receive on VOLUM3 or email.
Click on the ringtone icon in the upper right corner to easily access this page and see your notifications.
Item Actions icon
Click the Item Action icon (…) to access more options and complete various actions such as publishing and delivering a plan, sending a meeting report, adding tasks to a meeting .....
![]()
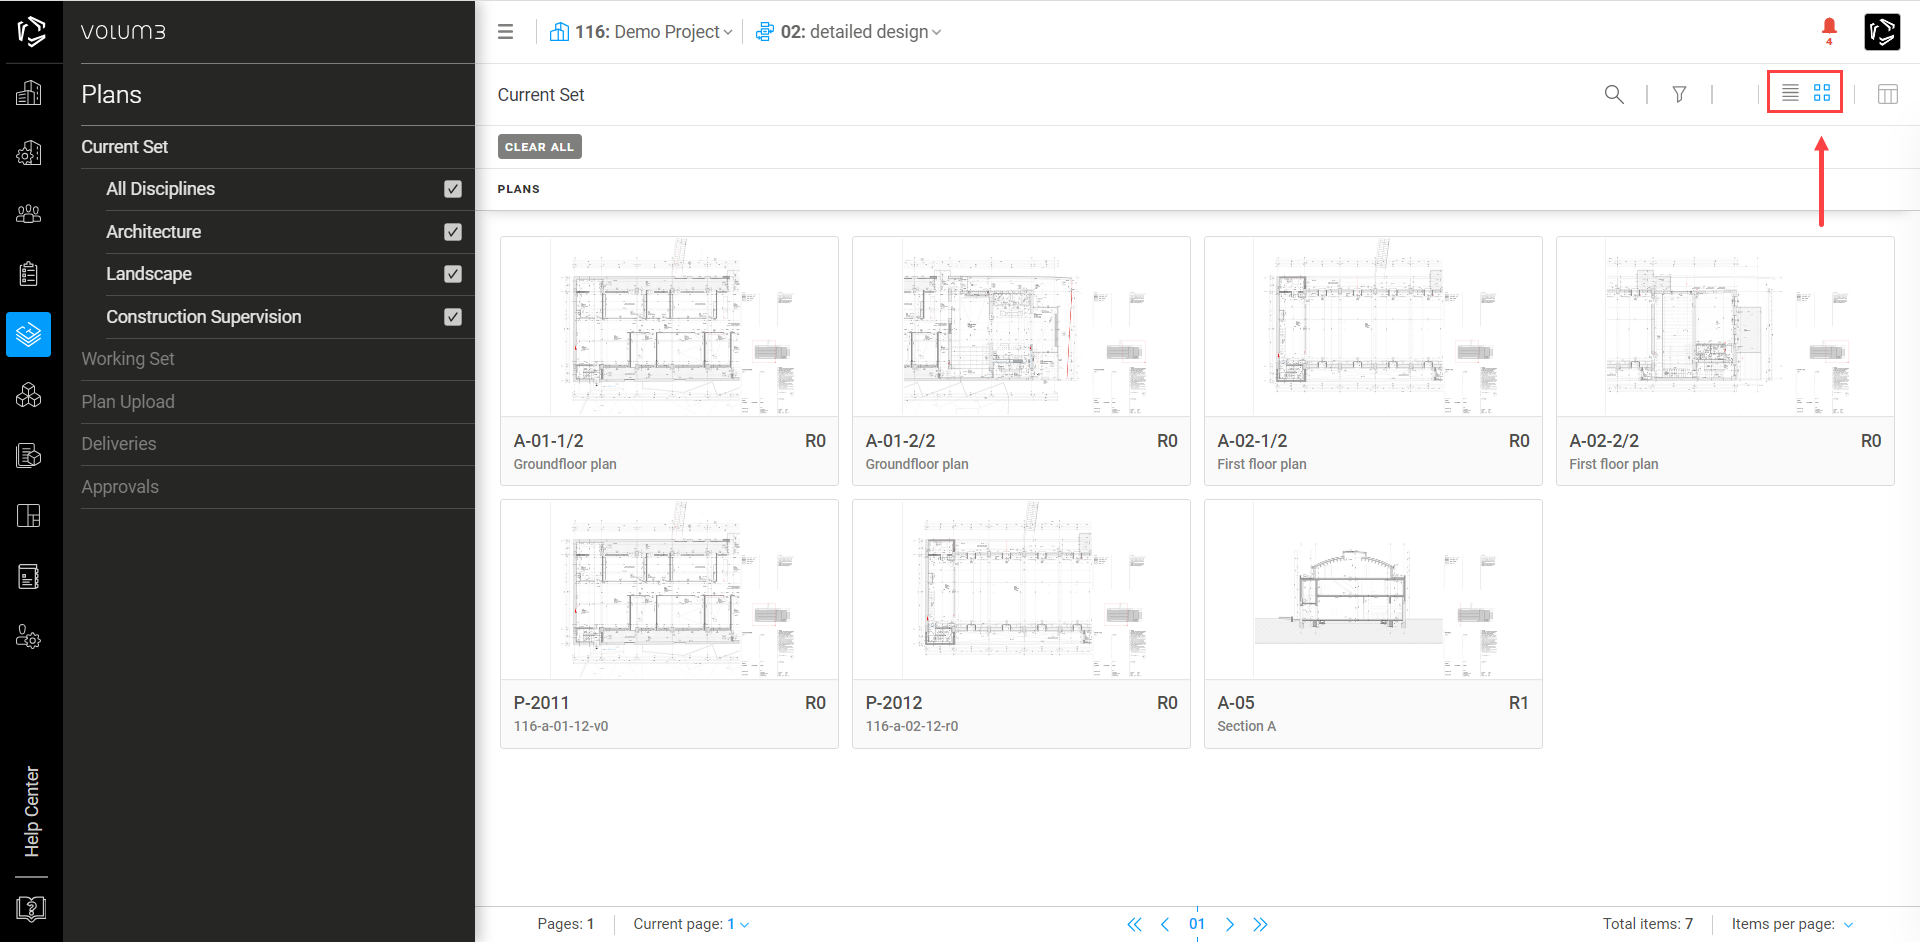
Grid view & list view
The grid view displays your items as thumbnail icons. In the list view, you can see the additional information about the project and you can sort your data by clicking on the title. Clicking on an item opens the menu with additional settings.
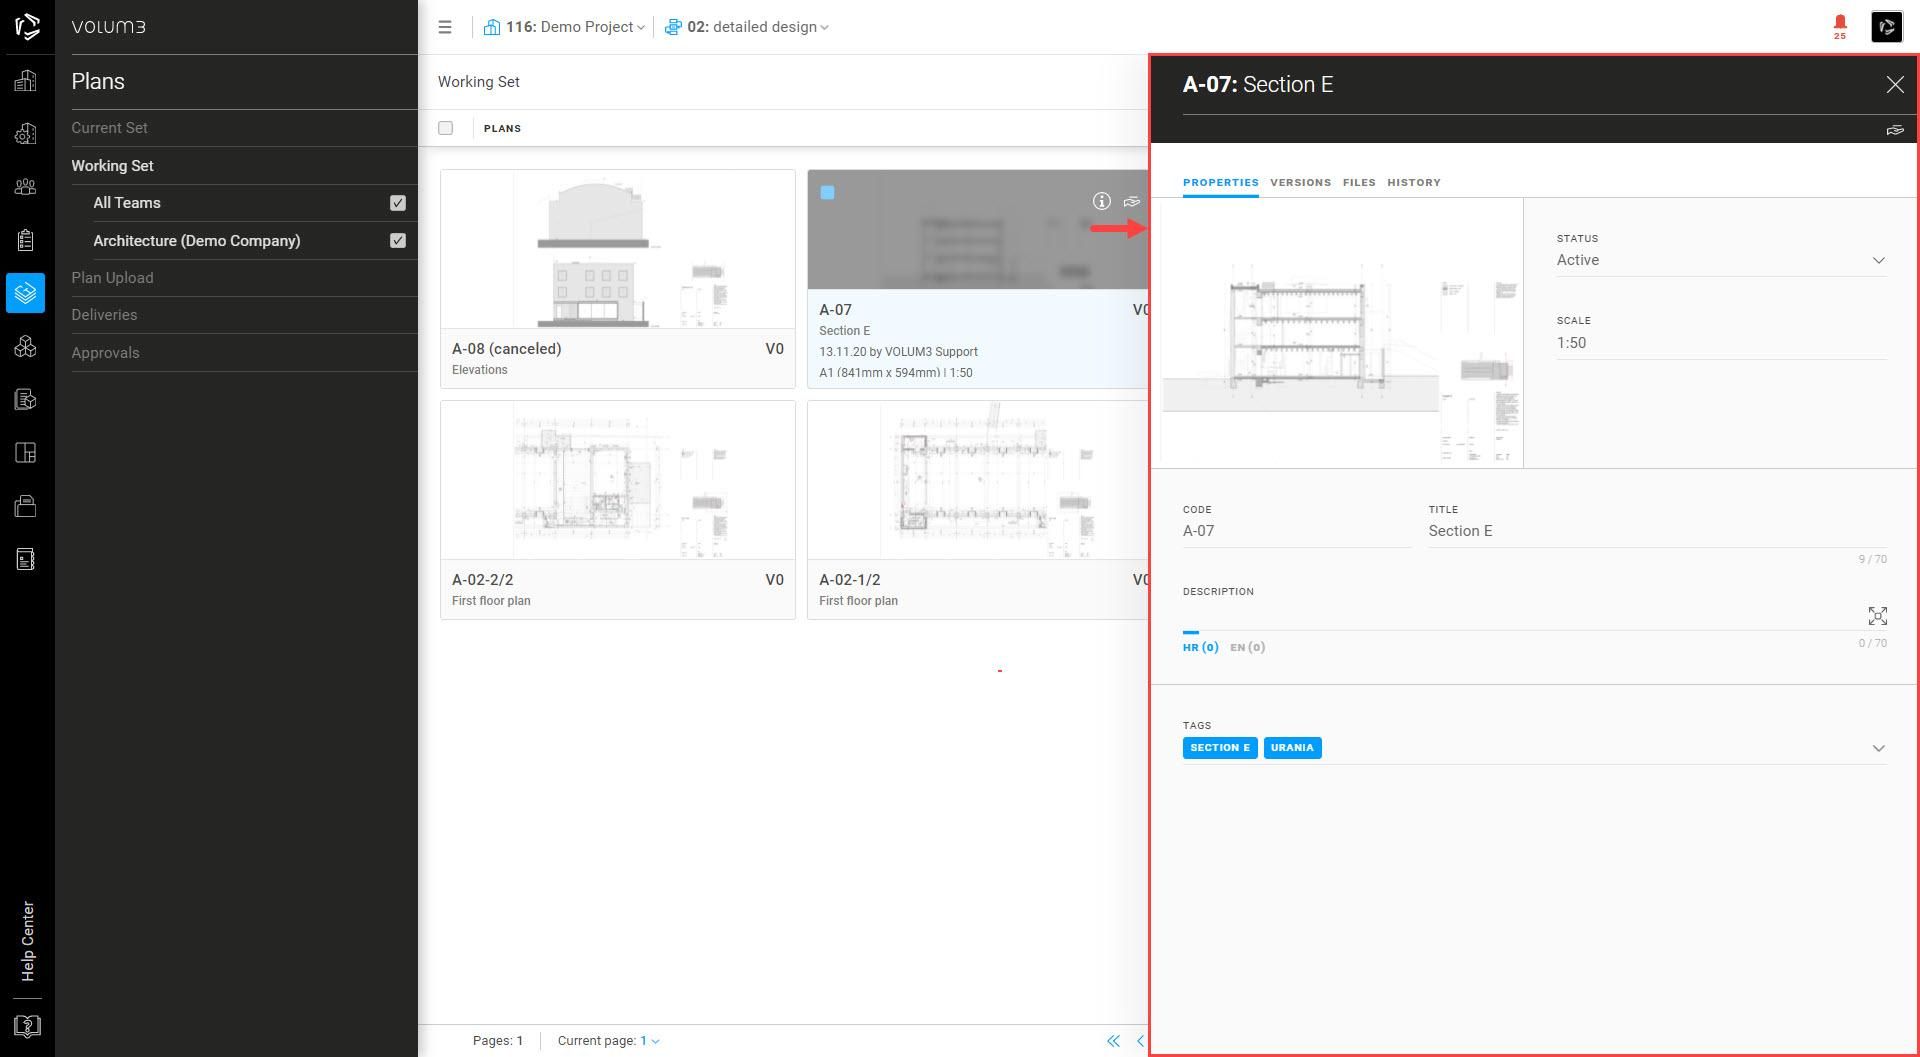
Flyout menu
By clicking on the item, a flyout menu will appear on the right side of the screen. In this menu, you can edit item information and perform specific actions, depending on the program section.
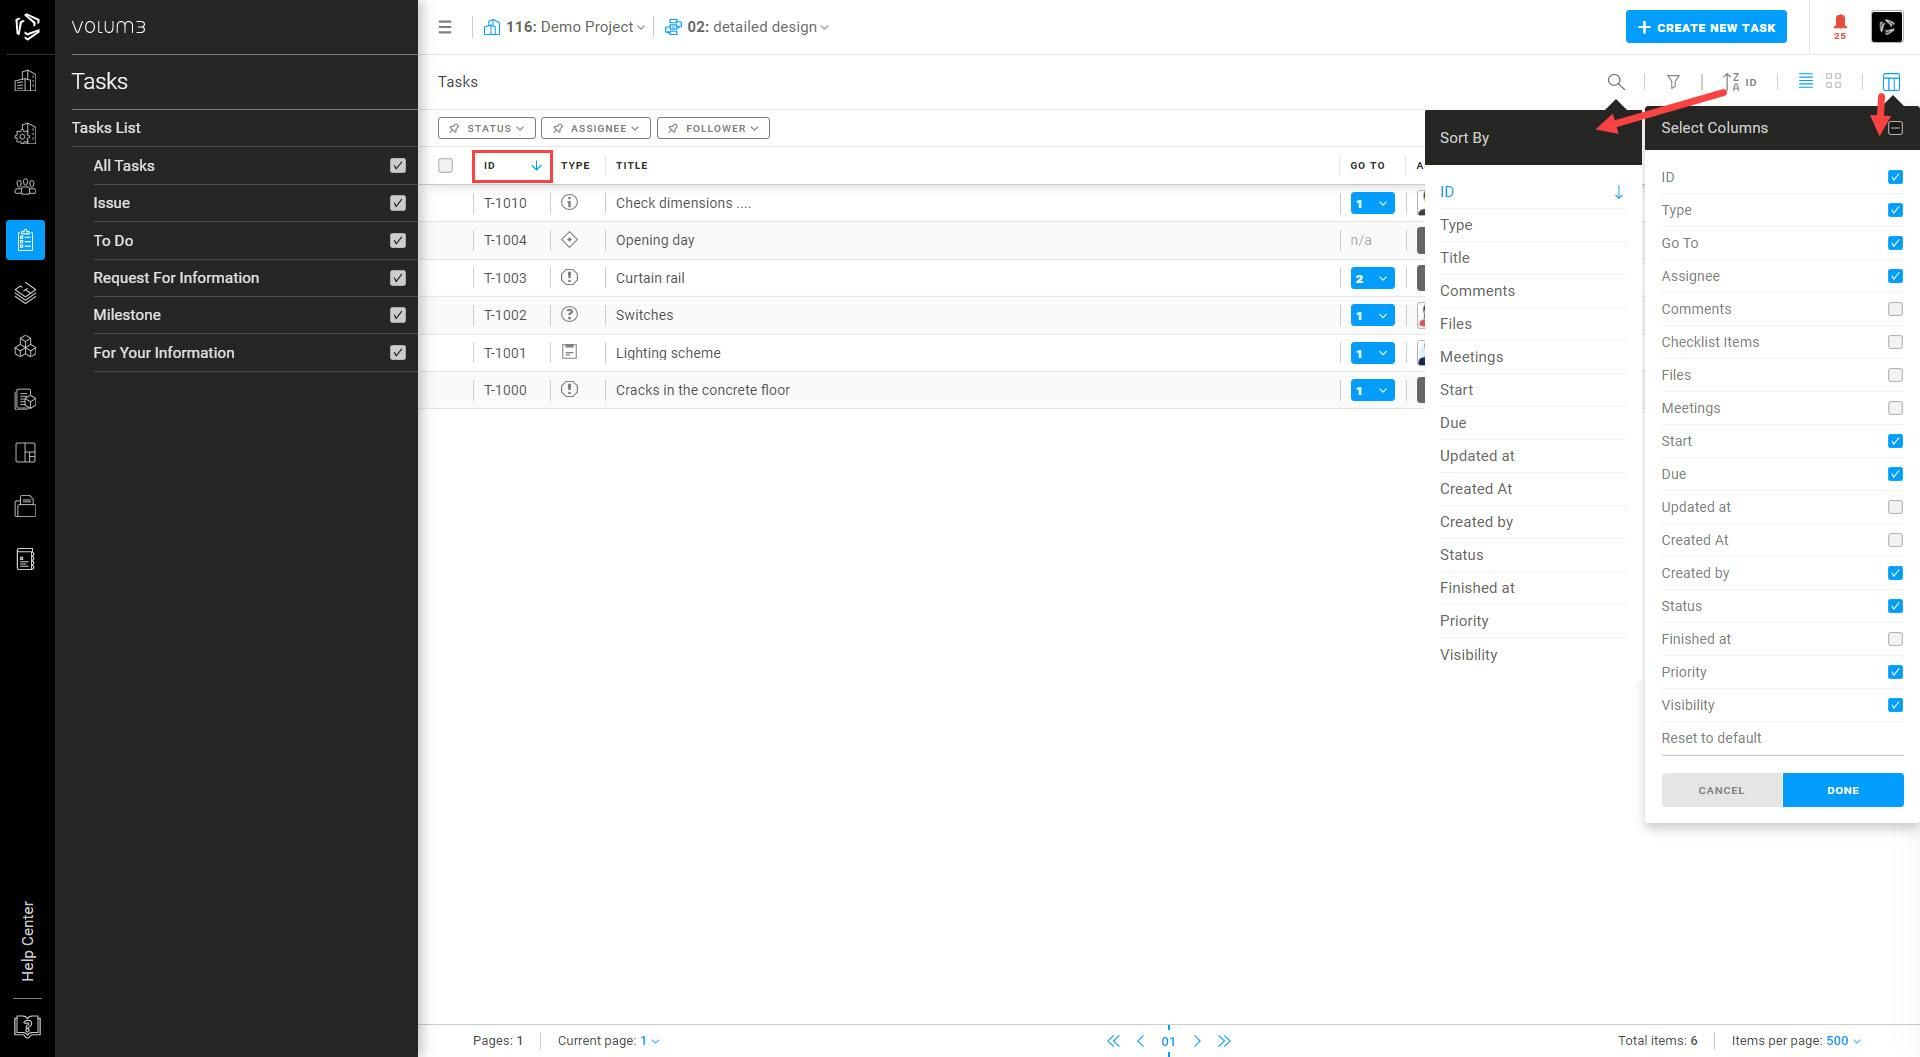
Sort & select
You can sort your projects, plans, tasks, meetings, specifications, files, and user lists in ascending or descending order by clicking on the preferred title. Click the Select Columns icon in the upper right corner and turn selected columns on/off to appear in the list view.
Search & filter
Search
You can search for your projects, meetings, tasks, plans, products, specifications and areas by keyword or part of a word. Click the magnifying glass icon in the upper right corner to enter the necessary data.

Filters
Filters in VOLUM3 help you quickly find what you're looking for—whether it’s a document, task, RFI, or something else. Instead of scrolling through long lists, you can apply filters to narrow things down and focus only on what matters to you.
Where You Can Use Filters
You’ll find filters in many different modules in VOLUM3, such as:
- Meetings
- Tasks
- Plans
- Products
- Specifications
- Bill Of Quantities
- Areas
- Timesheets
Just look for the Filter icon in the toolbar—clicking it will open a dropdown menu where you can choose what to show.

What You Can Filter By
The filters you see will depend on which module you are using, but here are some common ones:
- Status – Show only items that are active, finished or in progress.
- By user – View items assigned to specific people or items they are following.
Note: For more info check out Company Roles
- Dates – Filter by creation date, due date, or a custom range.
- Tags – Use keywords to group and find related items.
- Discipline / Type – Narrow results by category like architectural or structural.
- Company – Focus on work done by a specific company.

How to Use Filters
- Click the Filter icon in the toolbar.
- Select one or more filter options—your results will update automatically.
- Combine different filters to be more specific (e.g., "Tasks assigned to me that are due this week").
To reset everything, just click Clear All. You can also remove individual filters by unchecking the box next to them.

Pinning Filters
If you use filters regularly, you can pin the specific filter panels so that they stay open all the time—no need to click on the icon each time. This is especially helpful when you're actively working through lists and want to adjust filters on the fly.
To pin filters:
- Open the filter panel by clicking the Filter button.
- Click the pin icon (📌) next to the group you want to pin.
- The group will stay pinned in the top left part of the screen until you decide to unpin it—even if you log out of VOLUM3.
You can unpin it anytime by clicking the pin icon again.

Preset Filters
Preset Filters let you save a specific filter setup so you can come back to it any time—no need to reapply filters each time.
To save a view:
- Apply the filters you want.
- Click Save at the top of the page.
- Give it a name.
You can switch between Preset Filters whenever you need, making it easier to stay organized and consistent. They can be found next to the pinned filters in the top left part of the screen or at the top of the filter dropdown menu.
Helpful Tips
Combine filters with sort options (like newest first or alphabetical) for even better results.
If something seems to be missing, check that a filter isn’t hiding it.
You can expand or collapse filter groups in the dropdown menu by clicking the arrow next to each group to view or hide the filters it contains.
Use Preset Filters and Pinned Filters together for a faster, smoother workflow—especially for recurring tasks or reports.
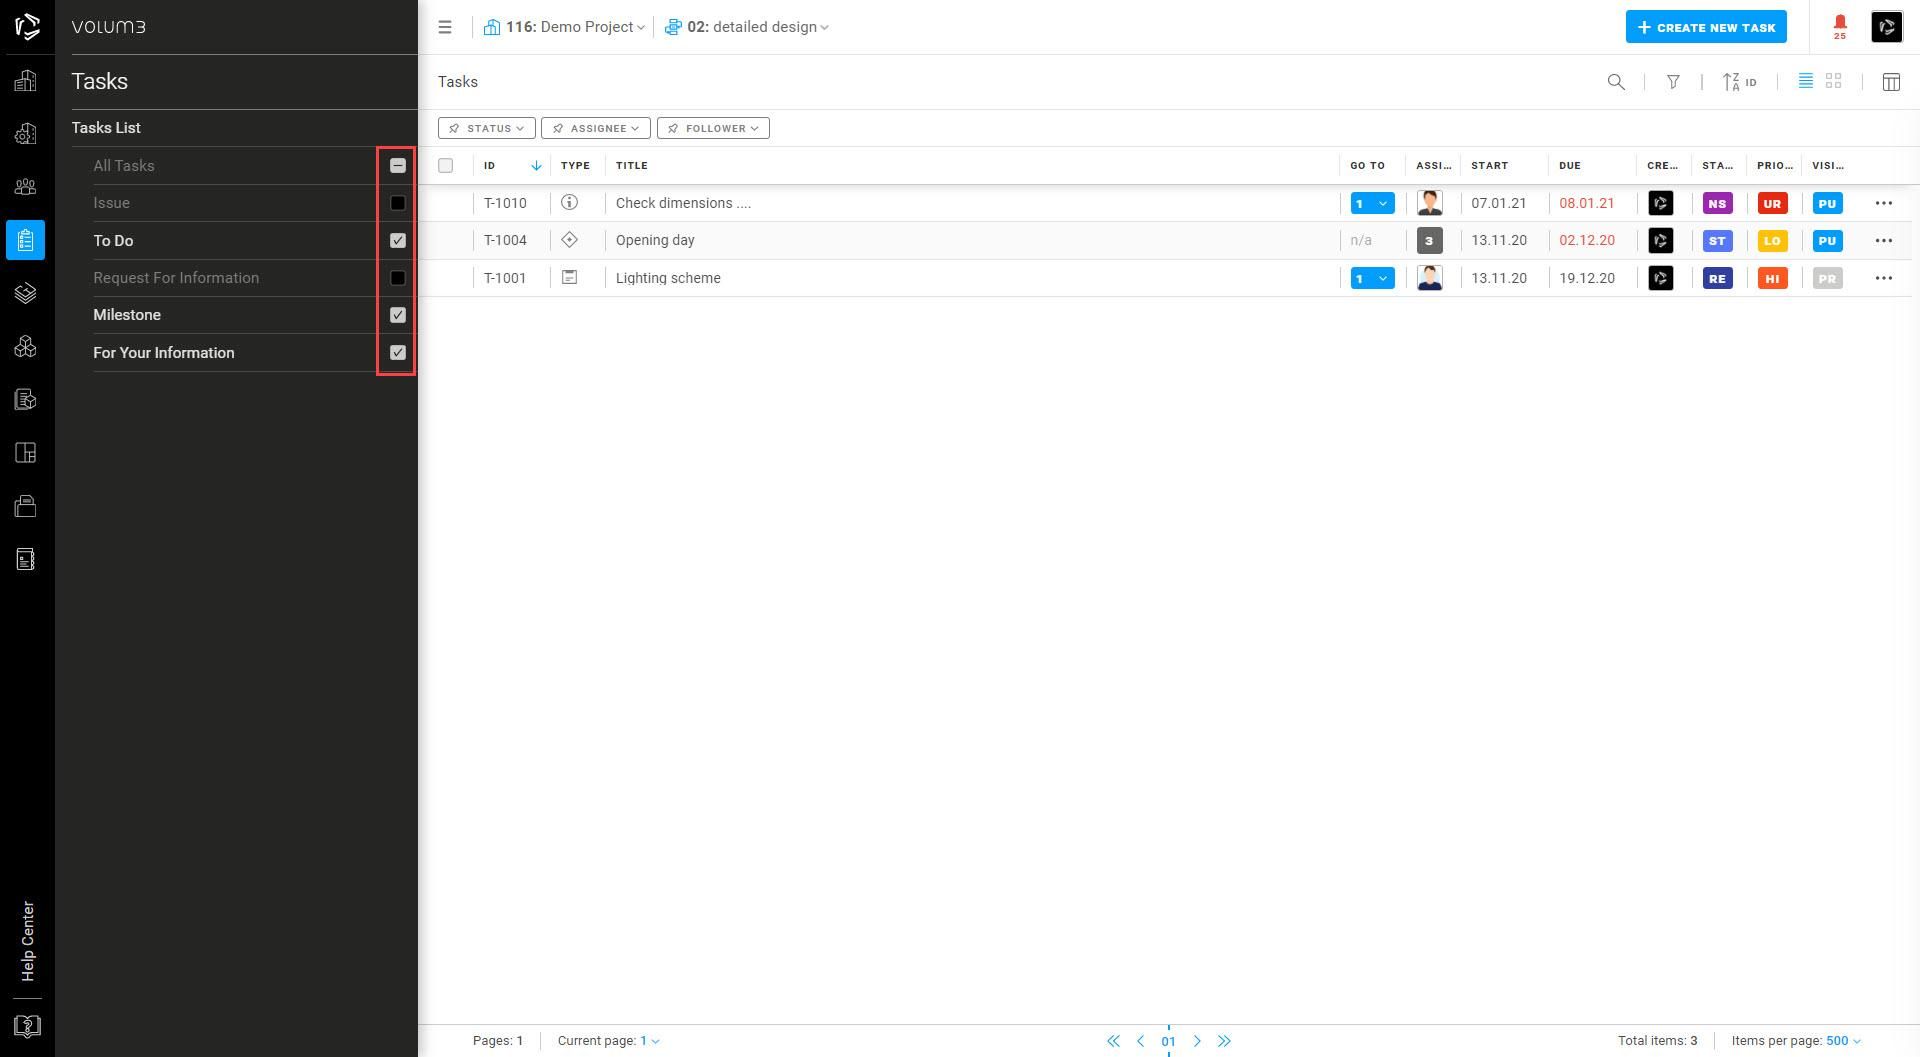
Turn categories on/off
You can turn categories in the submenu on and off by clicking on the checkbox next to the category. By clicking on All Tasks (Meetings, Specifications ..), you can turn them all on or off.
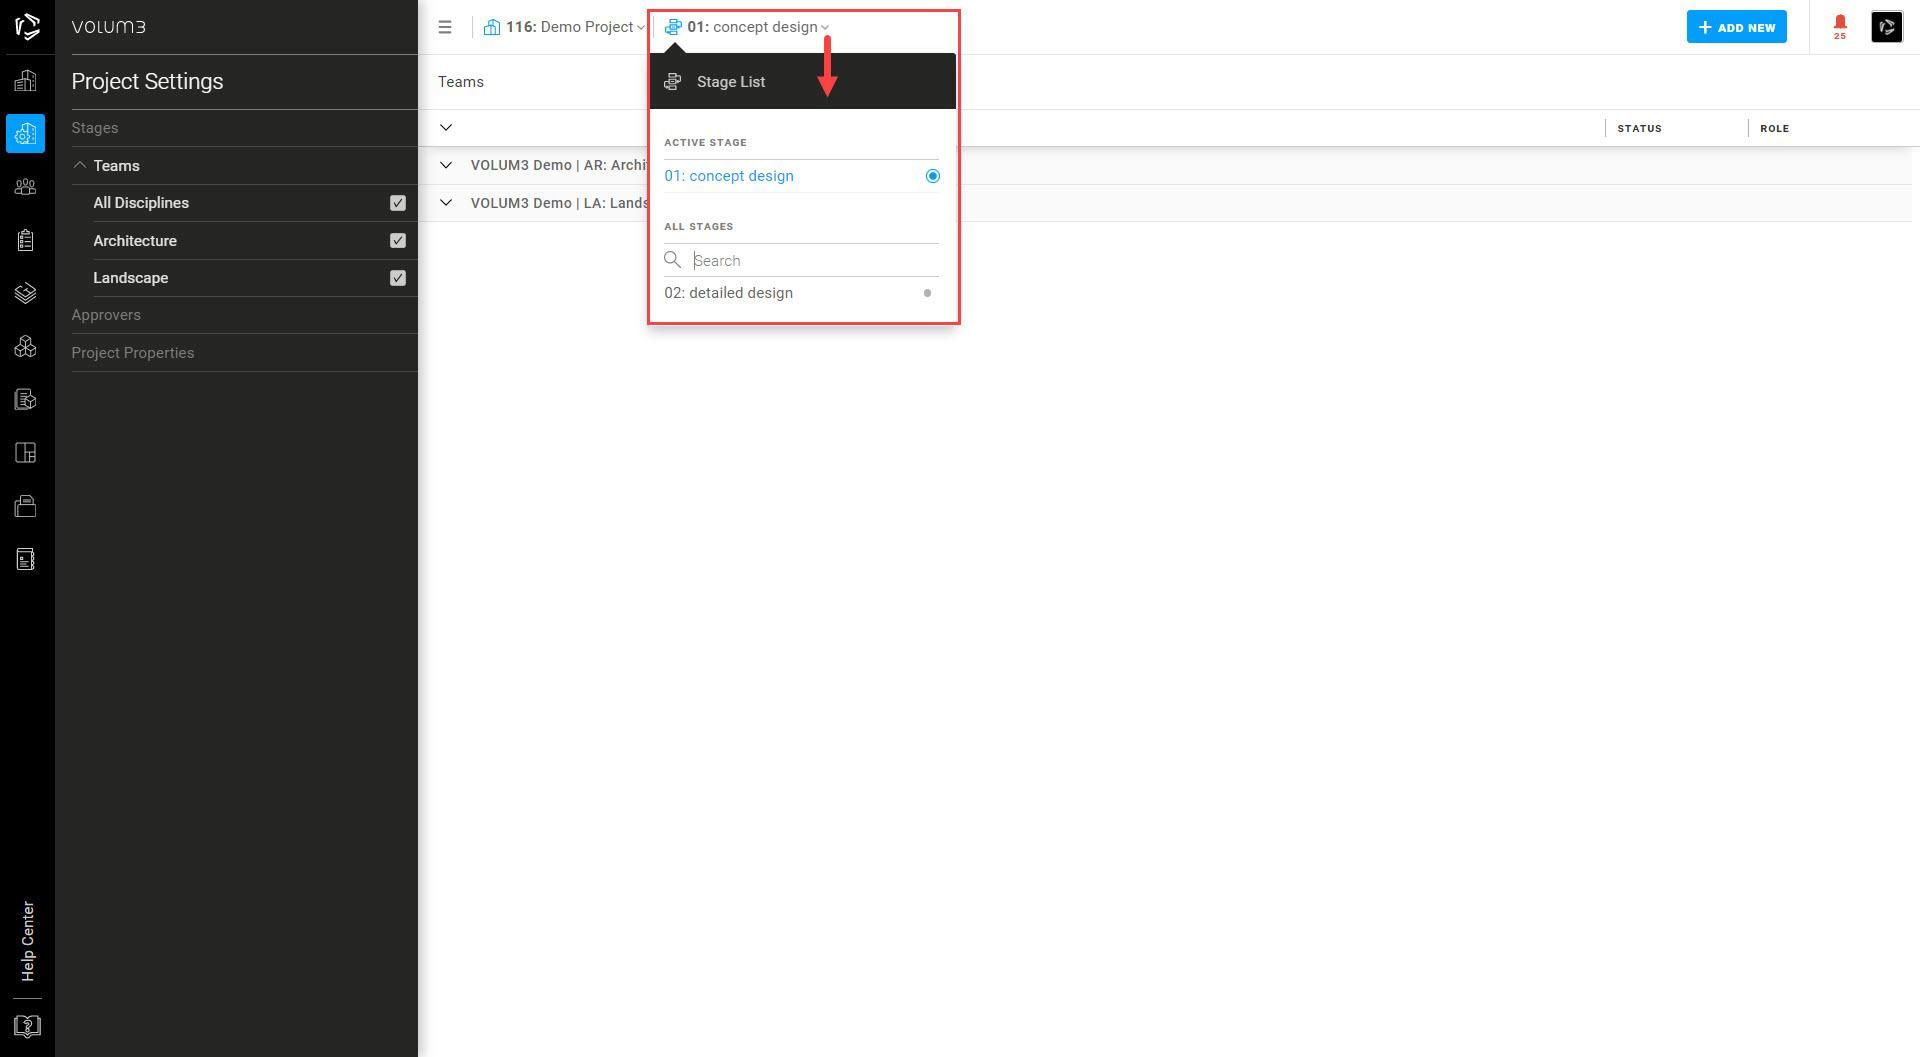
Easily switch between projects & stages
When you click on the project name in the upper left corner, a drop-down menu will appear, allowing you to switch between projects. This is possible from the following sections: Project Settings, Meetings, Tasks, Plans, Specifications and Areas.
When you click on the stage name in the upper left corner, a drop-down menu will appear, allowing you to switch between stages. This is possible from the following sections: Project Settings (Teams), Meetings, Tasks, Plans, Specifications and Areas.
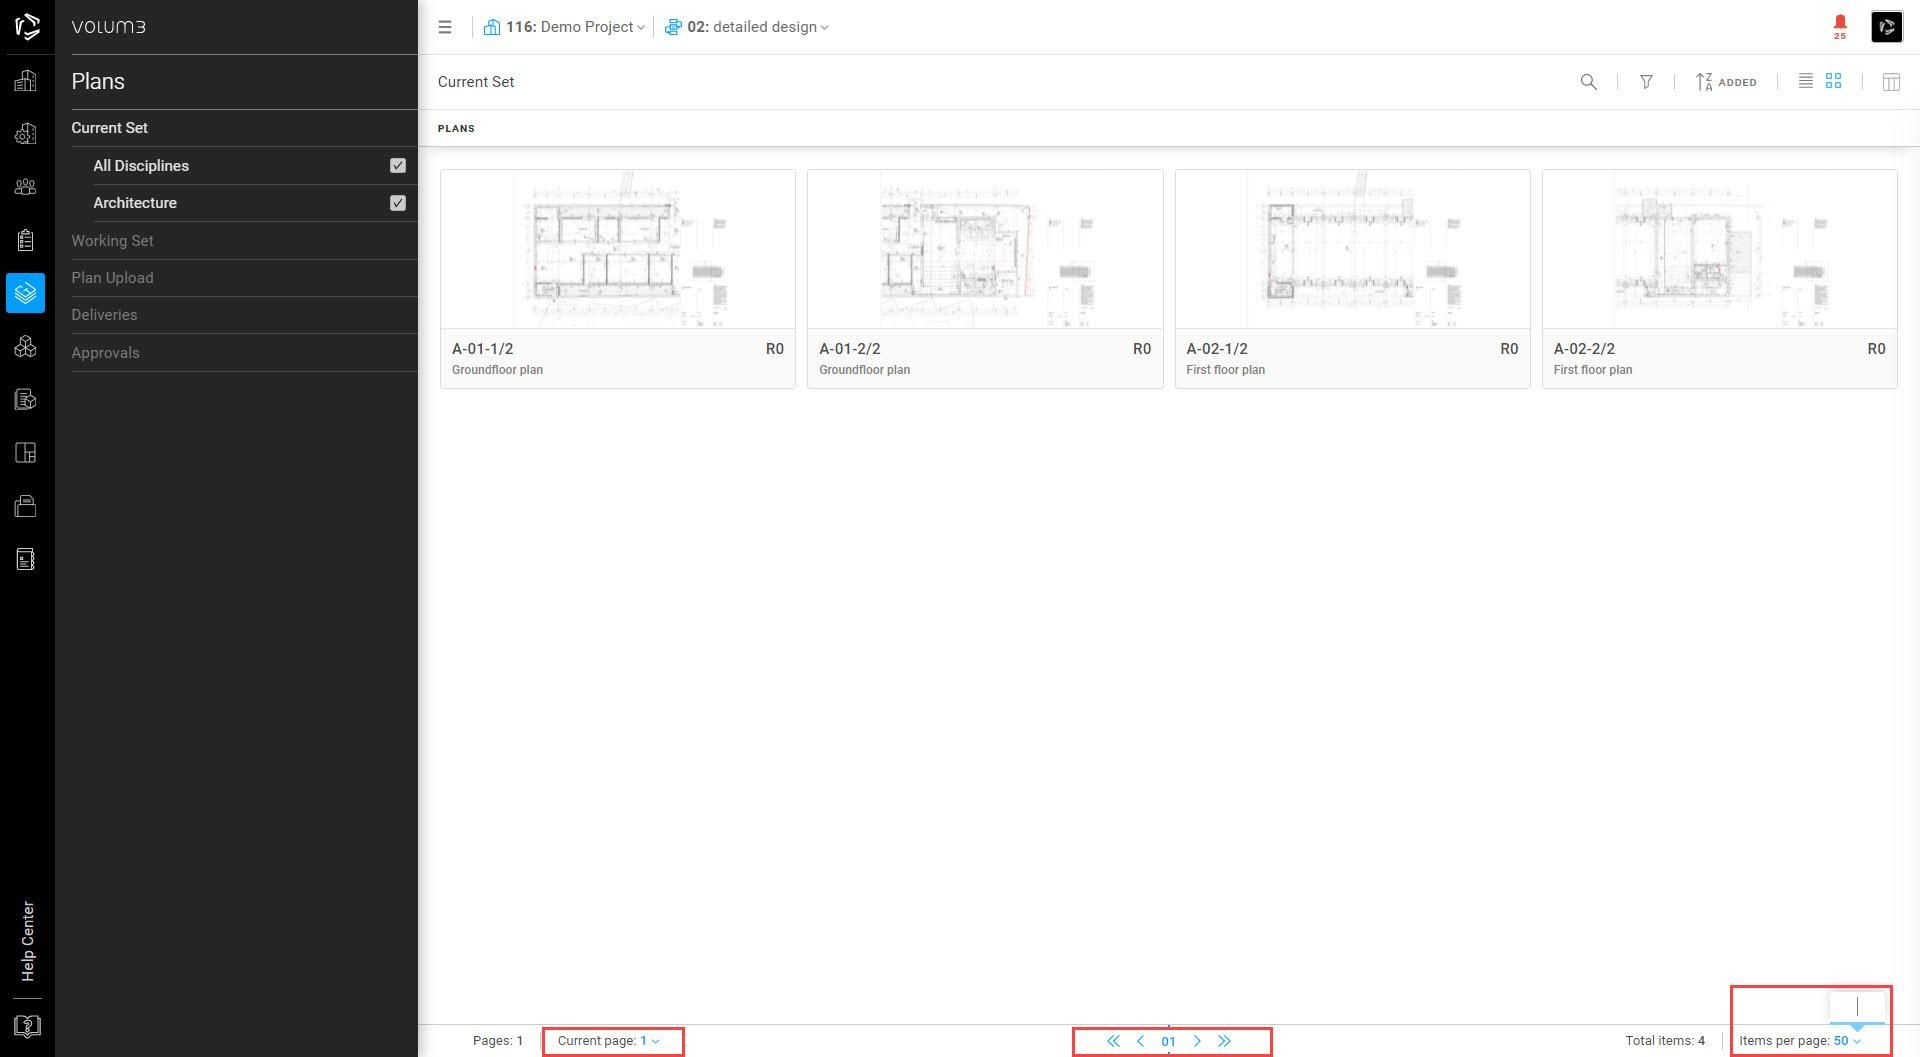
Page numbers and items per page
In the page control bar at the bottom of the page, you can view and sort your data per page. In the left corner of the bar, you can browse and select the current page. In the middle of the bar, you can switch pages. In the right corner of the bar, you can view and edit the number of items per page.
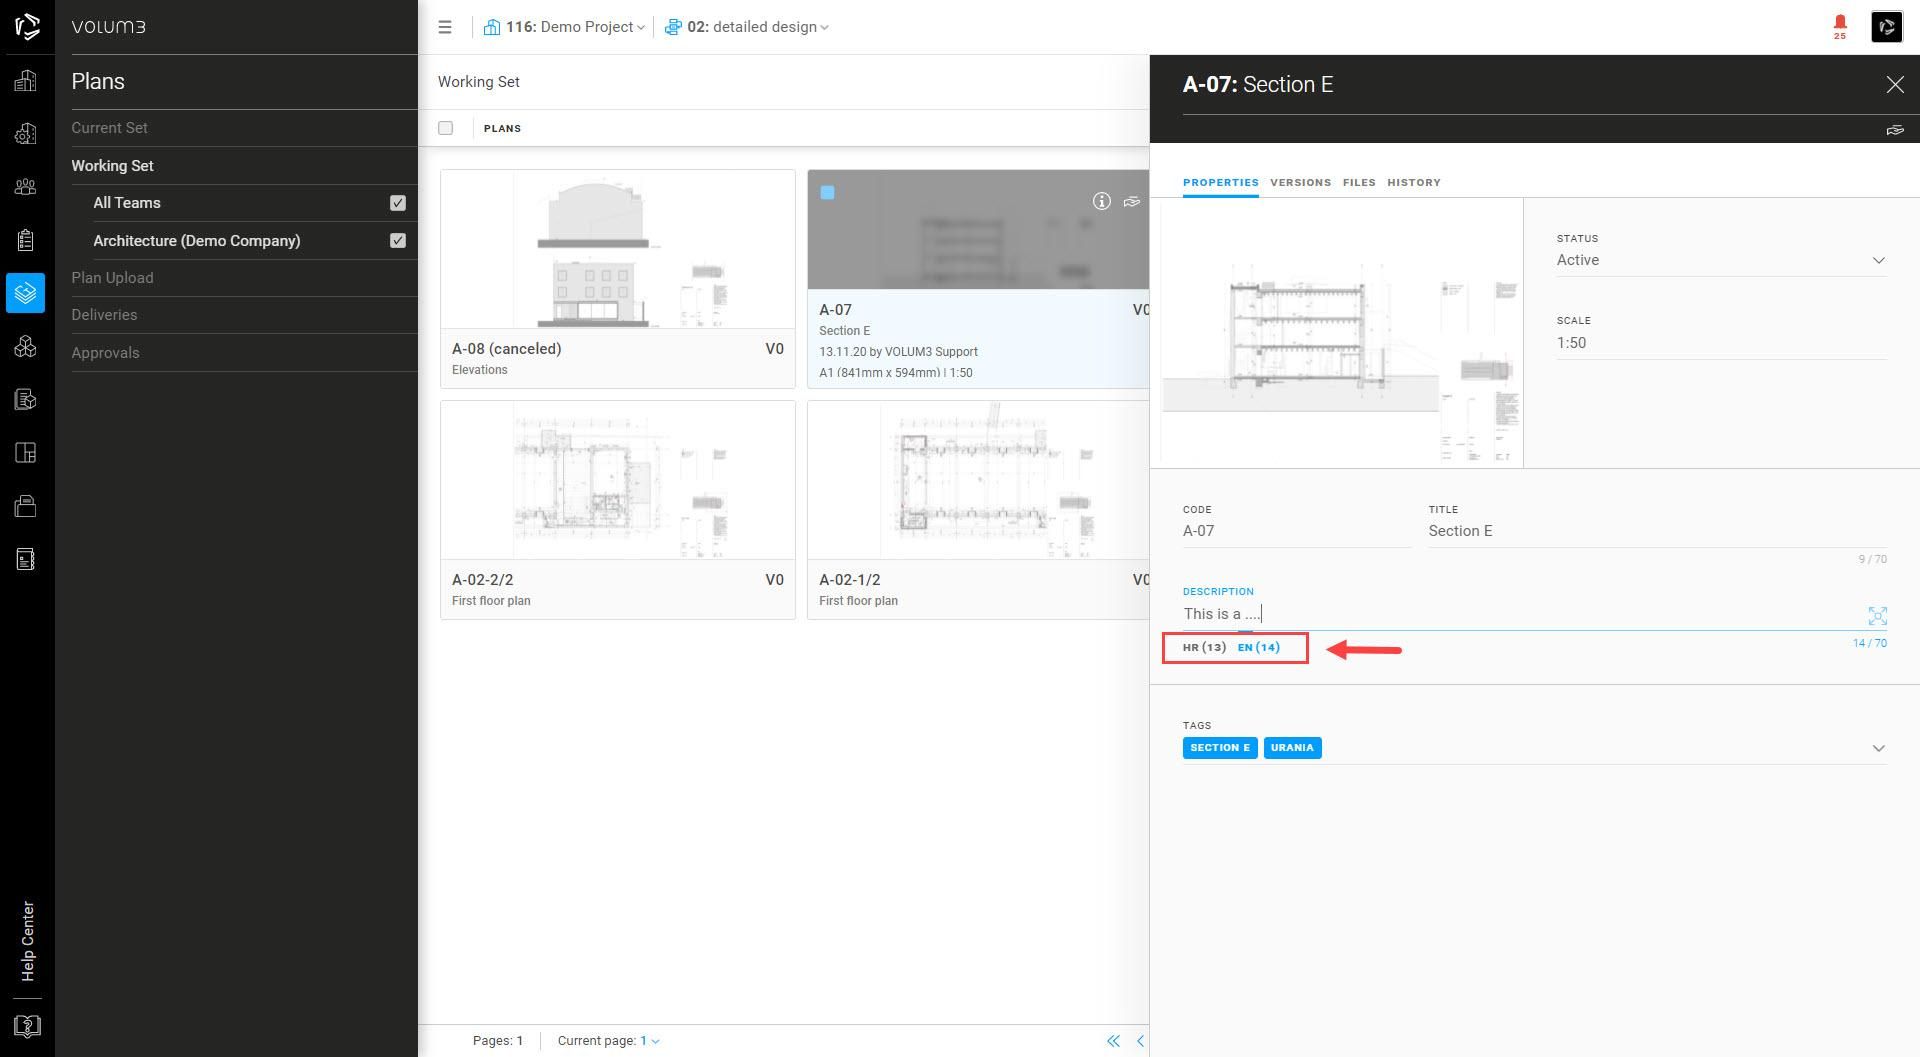
Project translations
You can enter project translations for users who use another language in the application by clicking on the language initials below the text.
Navigating the Site

Trg E. Kvaternika 3/3, 10 000 Zagreb, Croatia
+ 385 1 333 1909 info@volum3.com


